Author: Luke Burchell

  • Camping in Mexico with two children

    Camping in Mexico with two children

    Field notes · outside the usual routes

    Camping in Mexico with two children

    When I was 21, on a multi-day solo trek in British Columbia — carrying my tent, sleeping bag, cold-weather gear and food — I learnt that I needed more than peanut butter, a heavy loaf of bread and bananas to feel excited about the next meal. After three days of hiking, the first thing I did on returning to civilisation was buy my first liquid-fuel backpacking stove.

    Now, with two children, school and work, I value the human centripetal force of homemade food more than ever. The WhisperLite has been replaced by a rather less compact butane stove.

    This page is our family’s packing list: the ten things we always carry on a camping trip in Mexico, and a few things that come along without ever making a list.

    Living and working in Guatemalan, South African and Mexican rural communities, I found food bringing people together not just in the home but in the street: chicken dust — spiced chicken grilled over charcoal — in the South African townships, tacos and consomé in Mexico, enchiladas and atol in Guatemala. Mexican natural parks and campsites are no exception — eating is never just a necessity to get through. That’s why four of the ten things on our list are connected to food or cooking.

    Where we camp

    Our camping is Chiapas camping. For five years we’ve been going back to the same site by a thermal river outside Tuxtla Gutiérrez; we’ve camped in the pine forest at Rancho Nuevo, above San Cristóbal de las Casas, where we live; and sometimes we drive down to the coast. The list below is one family’s kit from those trips, refined mostly by forgetting things. Prices are marked ✓ — what I actually paid, with the year and place.

    Four of the ten things we carry are connected to food or cooking. That isn’t an accident.

    1 · A butane stove

    They sell them on Amazon and in well-stocked ferreterías. Mine boils water faster than my electric kettle at home, and you can buy the butane cartridges (butano) in almost any ferretería, because the same cans fit blowtorch heads. It’s not a backpack item, but it earns its place in the car. I use it mostly for breakfast — eggs and beans — and for tea and coffee. A cartridge gives me at least an hour of cooking, and since I cook quick meals, I generally get three camping trips from one can. I only use it outside — never in the tent.

    Fried eggs in a pan on a single-burner butane cartridge stove, on a wooden table beside a thermal river in Chiapas
    Breakfast on the butane stove at the river site outside Tuxtla Gutiérrez — eggs first, coffee next.

    2 · Long sleeves — and, for me, quercetin

    I don’t use insect repellent, but I do cover up anywhere with mosquitoes, and I carry quercetin. I swell more than most people after insect bites and I suffer from allergies; I’ve found it reduces my own itching and swelling, so I start taking it a few days before we leave, and I take it with vitamin C.

    That is my personal routine, not advice for anyone else — and my choice not to use repellent shouldn’t be read as advice to avoid it, particularly where mosquito-borne illnesses are present. The WHO’s dengue guidance recommends a suitable repellent as well as covering exposed skin.

    3 · Salt, oil and coriander

    Living in Mexico, I can think of few dishes that don’t take coriander (cilantro). Corn, meat, salad, a plain avocado — it livens all of them.

    4 · A ground sheet

    I’ve never bought a footprint — the plastic sheet cut to your tent’s exact dimensions. For MX$150 ✓ (San Cristóbal, 2026) a generic tarp protects the underside from sharp stones and general wear, and adds a second waterproof barrier. Mine is a Pretul, folded so it sits under the tent base without protruding — you don’t want rain running over the tarp and pooling under the tent. Just about every ferretería I’ve been into sells them, and with a little rope or cord you can also sling one between three or four trees for shade or a roof.

    5 · A yoga mat

    For stretching, sitting and sleeping on. Mine is thick enough that I use it under my sleeping bag instead of an inflatable mat — and it’s added incentive to do a little yoga or meditation while on holiday. That’s for the warmer places, though; a cold night in the pine forest at Rancho Nuevo needs more insulation from the ground than a yoga mat gives you.

    6 · Sleeping-bag liners

    With the children I use liners far more than actual sleeping bags, because we mostly camp in the warm zones — near beaches and lowland rivers. Sleeping bags are a pain to wash and dry properly; a liner goes straight into the washing machine between trips and takes up very little space.

    The liners have their limits, and we learnt them the honest way: one winter at Rancho Nuevo we went up without proper sleeping bags, and the tent froze over. Waking to an icy white pine forest was beautiful. Making the morning fire with trembling hands was not — it was a painfully cold start to the day. For the high, cold sites, take real sleeping bags.

    7 · Refried beans and totopos

    Ultra-convenient, versatile, and easy to find in tiendas and OXXOs across Mexico — and despite the salt, far healthier than most of what you’ll find in a petrol-station shop. The beans come in a bag, so they’re easy to carry and leave only a small amount of litter, easy to stash until you’re home if there are no bins. Before we leave I add two purchases from the market: eggs and avocado. Together with the beans and totopos they make a one-pan dish that’s ready in ten minutes and feeds the family. The only caveat: your kids may not like avocado.

    Frying pan full of refried beans, scrambled eggs, avocado and totopos on a camp table, a hand scooping some onto a totopo
    The ten-minute one-pan dish — refried beans, eggs, totopos and avocado — at the river site, July 2026.

    And take mangoes. Our favourite fruit for camping — they peel easily, don’t get crushed, and don’t ripen too quickly, unlike bananas, which can go over in a single hot day. To the unripened, still-hard ones you can add lime, salt and chilli, if you want to feel a little more Mexican.

    8 · Shoes for the water

    Every time I take the children to a river and forget our slip-on water shoes, I am deeply repentant. With them on, you can happily walk across a stony riverbed all day without wincing once.

    Child swimming in a warm thermal river below small limestone cascades, seen from behind, Chiapas
    Below the cascades at the river site outside Tuxtla Gutiérrez — a stony bed under warm water. This is where the water shoes earn their keep.

    9 · Ocote — resinous pine

    In the rural communities where I’ve lived in Mexico and Guatemala, families cooking over wood commonly use ocote as a natural firelighter — the resin takes a match directly. Rather than felling a whole tree, I’ve watched people slowly hack smaller resinous sticks from living ones. It also self-seeds remarkably quickly in my garden. I buy it ready-cut into small sticks for MX$20 ✓ at the market in San Cristóbal (2026) — I see it in the local markets and sold on the street. It burns with thick black smoke, so light it in the open, never inside the tent or under a closed shelter.

    One more use for it: at the coast, if we can salvage some old coconuts, we use ocote to get the husks smouldering, and the smoke seems to reduce the mosquitoes around us. Do it where fires are allowed, and keep the smouldering husks well away from the tent and the children. The last time we camped at the coast, the coconuts were donated by the owner of the campsite.

    10 · Toilet paper and baby wipes

    Many camping areas have very simple bathroom facilities and no guarantee of paper. I always carry a roll, along with baby wipes for grubby hands and for cleaning muddy feet before they come into the tent. The used wipes get bagged with the rest of our rubbish and come home with us — never flushed, never left at the site.

    The other thing in my pickup

    Like many people in rural Mexico, I usually have a machete in the back of my pickup. I use it sometimes to dehusk coconuts — much harder work than you might imagine — and for cutting small branches and preparing wood for a campfire. And although I have never felt unsafe camping in Mexico, I do find it reassuring to have it nearby at night when we’re somewhere remote.

    The tent I downgraded

    Until recently I had a mid-range tent, highly wind-resistant and waterproof. When the second pole broke after years of use, instead of repairing it I replaced it with a budget Amazon-brand tent, similar to the Coleman Sundome. It feels substantially less robust — but the mesh sides, with a really simple tarp fitted over the top, make it far more comfortable in hot weather. I’m probably not going back to a more expensive tent.

    Budget orange dome tent pitched on bare earth under coconut palms at a river campsite, a small fire burning nearby
    The budget dome under the palms at the river site — fire going, children already in the water.

    We are not camping to save money.

    Why we keep going back

    Camping in Mexico isn’t automatically the cheap option. At Rancho Nuevo we paid MX$300 ✓ for the tent — four of us, one night — back in 2021, when that was about the price of a very cheap room; the price will have moved since. At the river site outside Tuxtla it was MX$40 ✓ per person (July 2026). So it’s worth planning the trip; but the money was never really the point.

    For five years now we’ve made the hour-and-twenty-minute drive to the same site by the thermal river outside Tuxtla — summer holidays, and again at Christmas. We’re friends now with the family who live at and run the site. The children play with the dogs and spend the evening, and most of the next day, in the warm river water under the shade of the coconut trees.

    Orange dome tent under coconut palms beside a thermal river outside Tuxtla Gutiérrez, two dogs playing in the foreground
    The campsite by the thermal river outside Tuxtla Gutiérrez — the same spot we’ve returned to for five years. The dogs come with the site.

    When we take that trip in the first week of July, just as the schools break up, the uninhibited feeling of being away from school — no rules, long days full of adventure — comes through in their laughter and in the way they move. That’s what we’re carrying all this kit for.

    This is one family’s kit list from our own trips in Chiapas, not a gear guide. Prices marked ✓ are what I actually paid, in the year and place stated — they will move. And nothing here is medical advice: the quercetin is my personal routine, and the WHO link above is the place to read about mosquito-borne illness, not this page.

    — Luke Burchell

    About the author

    Written by Luke Burchell. I live in San Cristóbal de las Casas, Chiapas, where I built my own house and am raising two children — the camping trips on this page are ours, from the past five years in the highlands, the lowland rivers and the coast. Read my full story →

    Field notes · Last updated · July 2026 · written in San Cristóbal de las Casas, Chiapas

  • Agua de lluvia para una casa en México

    Construir en México · captación de agua de lluvia

    Captación de agua de lluvia en México: cómo vivo sin conexión a la red de agua

    Todo el que planea captar agua de lluvia se preocupa por no juntar suficiente. En mi terreno pasa justo lo contrario: en un aguacero fuerte puedo captar más agua de la que uso en toda una semana, y luego no cae nada durante meses. Vivir sin conexión a la red de agua no es, en realidad, un problema de captación. Es un problema de almacenamiento y de tiempos.

    LugarSan Cristóbal, Chiapas
    FuenteAgua de lluvia, sin red
    AlmacenamientoCisterna de 10,000 L
    Aguas residuales3 etapas, autoconstruido

    Cómo funciona

    Mi terreno no tenía conexión de agua. Así que la casa funciona con lluvia: captada de los techos, filtrada de forma sencilla, almacenada en una cisterna enterrada, bombeada hasta un tinaco y devuelta por gravedad — con el agua sucia filtrada otra vez en un sistema que construí yo mismo, a mano. Esto es lo que de verdad implica, y cómo es vivir así en realidad.

    Qué cubre

    Esto está basado en una obra autogestionada en San Cristóbal de las Casas, Chiapas — no es un diseño de saneamiento, una norma de seguridad para agua potable ni una guía legal sobre derechos de agua. Es la mitad “fuera de la red” de la historia del agua: la pareja de mi guía sobre el sistema de agua para una casa en México, que cubre cómo llevar el agua hacia y a través de la casa — la cisterna, la bomba, el tinaco, la alimentación por gravedad y la elección entre tubería CPVC o TuboPlus. Esta página trata de dónde viene el agua y a dónde va después.

    Mi sistema de agua fuera de la red, de un vistazo

    Techo de lámina filtro de piedra simple cisterna de 10,000 L bomba tinaco casa filtro de aguas residuales pozo de absorción

    hasta 5,000 L captados en un día ~1,000–2,000 L/semana de uso cisterna de 10,000 L aguas residuales en 3 etapas sin red de agua

    La versión honesta

    No soy un purista de la vida fuera de la red — esto es sobre resiliencia

    Déjame ser honesto sobre lo que esto es y lo que no es. No vivo un sueño de impacto cero. Tengo excusados de descarga — rompí la regla de “fuera de la red” de usar baño composta — aunque instalé el tanque más chico que encontré y le metí una botella de 600 ml adentro, lo que baja cada descarga a unos 3.1 litros. Uso una bomba con electricidad de la red. Esto no es ideología; es una casa sin conexión de agua, hecha para funcionar con lo que cae en el techo.

    Pasé años trabajando en desarrollo internacional en zonas rurales de Guatemala — en un momento como especialista en innovación, donde probé una bolsa de almacenamiento de agua de lluvia de África que se montaba bajo un techo como una pequeña carpa. Abastecer a mi propia familia necesitaba algo mucho más robusto que esa bolsa, y un sistema de agua fuera de la red fue en lo que terminé.

    El problema real

    El verdadero problema del agua de lluvia no es captarla

    Si estás planeando captar agua de lluvia en México, lo primero que hay que aprender es que captar la lluvia es la parte fácil. Antes de construir nada, pensaba que el agua de lluvia era, sobre todo, un tema de captación: apuntas el techo a un tambo y ya. Resultó que el verdadero reto eran otras tres cosas, y solo una de ellas es fácil.

    Los tres retos del agua de lluvia

    El retoPor qué es más difícil de lo que pareceQué hice
    Sacar el agua del techoLos techos casi nunca tienen una sola pendiente pareja, así que el agua no llega toda a donde la quieres.El reto fácil — canaletas y tubería lo resuelven. Planéalo desde el diseño del techo, no como algo que se agrega después.
    Filtrar lo bastante rápidoLa lluvia torrencial llega toda de golpe; un filtro fino se tapa o se desborda y pierdes justo el aguacero que querías captar.Filtro a propósito de forma gruesa en la captación — mantén el flujo alto, y limpia el agua más adelante en la cadena (ver abajo).
    Guardarla durante los meses secosEste es el verdadero límite. La lluvia llega en unos meses intensos, y luego hay poca el resto del año.Dimensiona la cisterna para la sequía, no para el aguacero. El almacenamiento es todo.

    La tercera fila es todo el juego. Mi techo de lámina — el que abastece la casa — mide cerca de 50 m² (5 × 10 m), y en los días más fuertes puedo captar hasta 5,000 litros en un solo día. Pero eso requiere una verdadera tormenta tropical: un milímetro de lluvia en un metro cuadrado es un litro, así que 5,000 litros de 50 m² significan unos 100 mm de lluvia en un día — algo que solo pasa un puñado de veces al año. Después de que terminan las lluvias, hacia mediados de noviembre, vives de lo que guardaste en octubre y noviembre, con apenas algunas lluvias ligeras y poco frecuentes hasta que llega la siguiente temporada de lluvias en mayo o junio. Ese largo tramo seco es justo la razón por la que la primera decisión de verdad es el almacenamiento.

    Almacenamiento

    Empieza por el almacenamiento — es lo único que no puedes rehacer

    Casi todo en un sistema de agua fuera de la red se puede ajustar después. La cisterna no. Es concreto colado bajo tierra, y vives con el tamaño que elegiste.

    La mía es una cisterna de concreto de unos 10,000 litros. Funciona — ha sostenido a una familia de cuatro durante las temporadas secas. Pero si la volviera a colar, iría a 12,000–15,000 litros, porque el almacenamiento es lo que cierra la brecha entre los meses que llueve y los que no. Una vez que está hecha, agrandarla significa romper concreto. La construcción en sí — lo que costó, cómo está revestida — está en la guía del sistema de agua, junto con la bomba y el tinaco; aquí el punto es más simple: erra hacia lo grande. El almacenamiento es el seguro más barato contra una temporada seca larga, y lo más difícil de agregar después.

    Una forma sencilla de revisar el tamaño

    Calcula desde una temporada seca, no desde la lluvia

    De forma frugal, podemos vivir con cerca de 1,000 litros a la semana como familia de cuatro — dos regaderazos rápidos cada quien y excusados de descarga reducida, sin lavar ropa. Si lavas ropa seguido, sube cerca de 2,000. Compara tu propia cifra con el tramo seco más largo que necesites cubrir y te haces una idea del almacenamiento que necesitas entre lluvias importantes. Es una cuenta de servilleta de una sola casa, no un cálculo de ingeniería — el área de tu techo, el clima y tus hábitos lo van a mover bastante — pero es la pregunta correcta antes de colar.

    Filtrado

    El error es filtrar el agua de lluvia demasiado fino, demasiado pronto

    Esta es la parte que no es intuitiva: en el punto de captación filtro menos, no más. Un filtro fino es justo lo peor cuando 5,000 litros quieren pasar en una tarde — se tapa, se atasca, y la lluvia que querías captar se va por la orilla.

    Así que mi primer filtro es deliberadamente tosco: un tambo de 50 litros con piedras grandes (10–15 cm) abajo y piedras más chicas (unos 5 cm) arriba. Sin medio fino, nada que ahogue el flujo. Saca las hojas y la arenilla y deja pasar el volumen. La limpieza de verdad pasa más adelante en la cadena, donde no tiene que mantenerle el ritmo a un aguacero:

    Mi cadena de filtrado — tosco primero, fino después

    • Tambo de plástico en el piso — saca la basura, mantiene el flujo alto
    • El filtro en línea que trae el tinaco Rotoplas — un segundo paso mientras se bombea el agua hacia arriba
    • Filtros de regadera baratos (de Amazon México) en el punto de uso
    • Un filtro de cocina para el agua que se bebe

    Capta rápido y sucio. Limpia despacio y seguido.

    La calidad me sorprendió. El agua no deja sarro en las regaderas, los lavabos ni los excusados, y para mi gusto sabe más limpia que el agua de la red — prefiero tomarla a depender solo de garrafones rellenados. Pero seré claro: el sabor no es una prueba de seguridad. Yo la tomo — sobre todo como té, así que va hervida — y no he tenido problemas, pero esa es mi experiencia en mi casa, no un consejo. El agua que escurre del techo puede traer bacterias y lo que sea que haya en tu techo. Si vas a tomar agua de lluvia, fíltrala y analízala bien, y trata el permiso de pozo y la calidad del agua como algo que hay que confirmar con alguien calificado para tu propio terreno.

    Hacia dónde va el agua

    A dónde va el agua de cada techo

    No toda el agua de lluvia es igual, y el techo de donde viene decide para qué sirve. El agua de mi techo de lámina es notablemente más limpia que la que escurre del techo de concreto — así que las mando a trabajos distintos en lugar de mezclarlas.

    Agua por techo — cada fuente a su trabajo

    FuenteQué tan limpiaPara qué la uso
    Techo de láminaEl escurrimiento más limpioAlimenta la cisterna → se bombea al tinaco → cocina y baños
    Techo de concretoMás sucia, más porosaSe manda a un tinaco Rotoplas aparte para lavar ropa
    Drenaje francésEscurrimiento de piso — con basuraTambo enterrado en el jardín, para plantas y animales

    Esta es una razón más por la que la decisión del techo y la decisión del agua están ligadas — el material que pones arriba cambia el agua que puedes captar abajo. Entro más a fondo en esa disyuntiva en techo de lámina vs techo de concreto en México. También es la razón por la que, si tu terreno no tiene conexión, el techo y la captación deben planearse juntos desde el inicio, no improvisarse después — el mismo punto que hago sobre comprar un terreno en México sin servicios.

    Excedente

    Planear para cuando sobra agua

    El otro lado de captar 5,000 litros en un día es que, en temporada de lluvias, te sobra mucha más agua de la que puedes guardar o usar — y el agua que no diriges a propósito termina donde no la quieres. El techo de lámina llena la cisterna principal; mi techo de concreto y el drenaje francés pueden entregar más o menos lo mismo otra vez, pero los tanques a los que alimentan son chicos — un Rotoplas de 1,000 y uno de 500 litros — así que en un día de tormenta fuerte casi toda esa segunda corriente simplemente se desborda. Un tubo de desvío manda el excedente hacia la calle una vez que los tanques están llenos. Así que parte de tener un sistema fuera de la red es dirigir el excedente a propósito — y aceptar que vas a perder el resto.

    Mi solución es sencilla y barata. Uso tubería de PVC con llaves en las uniones para poder cambiar el flujo de varias formas — desviándolo, por ejemplo, hacia un tambo enterrado en el jardín, para guardar agua para las plantas y los animales. En una pendiente, los drenajes franceses hacen el mismo trabajo con el escurrimiento de piso: alimentan el mismo almacenamiento en lugar de dejar que el agua abra canales en tu terreno.

    Aguas residuales

    La parte difícil que subestimé: las aguas residuales del baño

    Pensé que el agua que sale de los baños iba a ser la parte fácil. Había leído sobre sistemas de filtración, visto videos, y pensé que sería cosa de excavar, poner tanques, agregar material filtrante y ya.

    No fue así. Se volvió uno de los trabajos manuales más grandes de toda la obra.

    El agua de lluvia se lleva toda la atención porque viene del techo, pero la otra mitad de un sistema de agua fuera de la red es qué pasa después de que el agua sale de la casa. En mi caso, las aguas residuales del baño pasan por un sistema de sedimentación y filtración en tres etapas que construí con materiales normales de ferretería — en parte porque no conseguí muchos de los materiales que veía recomendados en internet. Lo cuento aquí como un ejemplo de advertencia, no como un diseño para copiar.

    Las primeras dos etapas son tanques de plástico enterrados, de los que se usan para almacenar agua. El primero solo capta y sedimenta los sólidos. El segundo lo convertí en un filtro de flujo ascendente: el agua entra por tubería hasta el fondo, así que la única salida es subiendo otra vez por una cama de piedras filtrantes, sostenida sobre el piso del tanque por una plataforma improvisada con cubetas volteadas. Lo único que cambiaría es la malla de esa plataforma — usé acero porque era lo que conseguí localmente, pero se va a oxidar; plástico o acero inoxidable durarían más.

    La última etapa es un tambo de plástico del mercado, lleno de piedra más grande (de 2.5 a 5 cm), como último filtro antes de que el agua se absorba en la tierra — en un pozo que rellené con piedra y escombro que sobró de la construcción.

    La primera lección fue sobre los tanques en sí. Fui barato y usé tanques normales de almacenamiento de agua en vez de tanques reforzados pensados para enterrarse — y un tanque vacío en un hoyo mojado no se queda donde lo pusiste. Para darles peso mientras trabajaba los llené a la mitad con agua; medio lleno me pareció más que suficiente. Luego, el primer aguacero fuerte del año llenó la excavación durante la noche, y a la mañana siguiente encontré un tanque flotando, levantado limpio de su lugar. Arreglar eso significó sacar el agua del hoyo inundado a mano, cubetazo por cubetazo — el tramo más miserable y desgastante de toda la obra.

    Desde la obra · el tanque que flotó

    Dos tanques de plástico para agua en una excavación inundada durante una obra de agua fuera de la red en Chiapas, México — uno flotó y quedó inclinado después de una lluvia fuerte
    La mañana después del primer aguacero fuerte del año: solo había llenado a la mitad los tanques enterrados de aguas residuales para darles peso, y uno flotó fuera del hoyo inundado durante la noche. La solución fue sacar el agua a mano, cubetazo por cubetazo.

    Lo que me enseñó es a tratar un tanque de plástico enterrado como un problema de flotación y presión, no solo como un contenedor. Llenarlo a la mitad no fue suficiente — una vez que el hoyo se inundó, el tanque todavía tenía empuje suficiente para salirse de su lugar, y uno vacío podría ser aplastado por tierra saturada. Así que si lo volviera a hacer, lo llenaría hasta arriba antes de rellenar el hoyo, y lo mantendría lleno hasta que la tierra quedara bien apisonada alrededor.

    La segunda lección fue el acceso. Iba improvisando mientras construía, y no había pensado cómo le haría el mantenimiento hasta que los tanques ya estaban enterrados. Eso se volvió un problema real, porque la tubería de aguas residuales de la casa quedaba mucho más profunda que el nivel del jardín. Así que no solo necesitaba hoyos profundos para los tanques — necesitaba una forma de crear una cavidad de acceso arriba de ellos, debajo del nivel del jardín.

    Al final, le pedí al albañil que hiciera una pequeña estructura de concreto, como un techito, sobre los tanques, con dos losas de concreto removibles para entrar. Como todo iba a quedar enterrado bajo el jardín, puse llantas grandes de camión sobre las losas de acceso — gratis, de una llantera — para no tener que excavar el jardín cada vez que necesitara entrar. Después metí macetas grandes dentro de las llantas, con piedras alrededor, que escondieron toda la estructura por completo.

    El sistema instalado + el acceso oculto

    Dos tanques de plástico para aguas residuales colocados en una excavación y unidos con tubería de PVC blanca antes de rellenar, obra de agua fuera de la red en Chiapas, México
    Los dos tanques de sedimentación ya conectados y colocados, con tapas, antes de rellenar — el primero capta y sedimenta los sólidos, el segundo le da al líquido una etapa más.
    Tapa de acceso de concreto armado colada sobre tanques enterrados de aguas residuales, con dos aberturas con cimbra de madera para losas de acceso removibles, Chiapas, México
    La tapa de acceso que agregué después: concreto armado colado sobre los tanques, con dos aberturas enmarcadas para losas removibles, para poder entrar sin excavar el jardín.

    Funciona, pero fue una solución improvisada. Si lo volviera a hacer, diseñaría el acceso a las aguas residuales antes de excavar cualquier cosa, y evitaría mandar el drenaje tan profundo dentro del jardín desde un inicio. Esa sola decisión le sumó costo, mano de obra y dificultad a todo lo que vino después.

    Dos advertencias honestas, porque esta es la parte donde equivocarse tiene consecuencias. Primero, si lo volviera a construir, probablemente le pediría a un albañil que hiciera las etapas en concreto en lugar de tanques de plástico reutilizados — más capacidad, sobre todo para sólidos, y un sistema más durable en general. Segundo, subestimé muchísimo la mano de obra. Tomó meses de excavar, mover tierra y encontrar las piedras correctas para la filtración, y luego tener a un albañil construyendo ese techo enterrado alrededor de los tanques y la tubería. Esto no fue trabajo de un fin de semana.

    Advertencia importante

    Las aguas residuales son un tema de salud y de regulación

    Estoy describiendo lo que construí para mi propia casa, no un diseño de saneamiento. Las aguas residuales del baño, las aguas grises y las aguas negras pueden estar reguladas, y los errores pueden causar problemas de salud. Trata esto como el sistema improvisado de una sola persona, y confirma el diseño, las distancias, el mantenimiento y los requisitos legales con alguien calificado para tu propio terreno.

    Lo que cambiaría

    Qué haría diferente

    Colaría una cisterna más grande — de 12,000 a 15,000 litros — porque el almacenamiento es lo que te sostiene durante la temporada seca, y es lo único que no puedes agrandar después. Planearía la captación y el techo juntos, en vez de tratar la recolección como algo que se agrega una vez levantada la casa. Y aceptaría más pronto que la parte que suena fácil (captar la lluvia) es trivial comparada con las partes que nadie se imagina: guardarla, dirigir el excedente, y lidiar con lo que sale de la casa.

    Vivir con poca agua

    Cómo se siente de verdad vivir con poca agua

    La gente se imagina que vivir sin red de agua significa privaciones. Sobre todo significa atención — y no hay un solo número, hay un rango. Dónde caigas dentro de ese rango depende, sobre todo, de dos decisiones: cómo lavas la ropa, y qué tipo de excusado tienes.

    Uso de agua por semana — dónde caes en el rango

    Escenario (familia de cuatro)Aproximado por semanaQué supone
    Frugal~1,000 litrosDos regaderazos rápidos cada quien, excusados de descarga reducida (~3.1 L), sin lavar ropa
    Con lavandería~2,000 litrosLa misma familia, pero lavando ropa seguido — el gran cambio
    Baños composta~1,000 litrosLo que ahorras del excusado se cambia por regaderazos más seguidos, aun así cerca de la cifra frugal

    El gran cambio es la lavandería — lavar ropa de verdad consume mucha agua, y es la mayor parte de la diferencia entre esas dos columnas. Los excusados son la otra palanca: los míos son de descarga normal, ajustados a unos 3.1 litros, pero un baño composta recuperaría suficiente como para bañarte más seguido y aun así quedar cerca del extremo frugal. De cualquier forma, vale la pena saber algo: lavar trastes puede usar tanta agua como una regadera, según tus llaves y cómo lo hagas — así que el ahorro muchas veces se esconde en las tareas cotidianas, no en las obvias.

    Lo que ganas a cambio es independencia y, honestamente, mejor agua — suave, sin sarro, y que no llega en pipa. Lo que pierdes es la posibilidad de olvidarte del tema. Vigilas la cisterna durante los meses secos como otros vigilan el medidor de gasolina. Después de unos años, ya es solo un ritmo, no una carga.

    La lluvia es la parte fácil. Todo lo que decide si tienes agua en abril pasa antes de que caiga la primera gota.

    Preguntas

    Preguntas frecuentes

    ¿De verdad se puede vivir en una casa con agua de lluvia en México?

    En mi terreno en Chiapas, sí — sin conexión a la red, el agua de lluvia de los techos es mi fuente principal, almacenada en una cisterna de 10,000 litros y bombeada a un tinaco. Que te funcione a ti depende de tu lluvia, el área de tu techo, el tamaño del almacenamiento y cuánto dura tu temporada seca. El factor limitante casi siempre es el almacenamiento, no cuánta lluvia puedas captar.

    ¿Cuánta agua gasta una casa a la semana en México?

    Para mi familia de cuatro en Chiapas, lo que de verdad necesitamos de agua de lluvia va de unos 1,000 litros a la semana cuando somos frugales — dos regaderazos rápidos cada quien y excusados de descarga reducida, sin lavar ropa — hasta unos 2,000 cuando lavamos ropa seguido, que por mucho es la tarea que más agua consume. Un baño composta te dejaría bañarte más seguido y aun así quedar cerca de la cifra baja. Tu propio número depende más de las regaderas, la lavandería y el tipo de excusado que de cualquier otra cosa.

    ¿Qué tan grande debe ser una cisterna para vivir de agua de lluvia?

    La mía tiene unos 10,000 litros y ha sostenido a una familia de cuatro (usando entre 1,000 y 2,000 litros a la semana, según la lavandería) durante las temporadas secas. Si la volviera a colar, iría a 12,000–15,000 litros para tener más margen. Dimensiónala contra tu tramo seco más largo, no contra un día de lluvia fuerte — y recuerda que es la única parte que no puedes agrandar fácilmente después.

    ¿Cómo se filtra el agua de lluvia para una casa?

    Filtro tosco primero, fino después: un tambo lleno de piedra en la captación para mantener el flujo alto durante un aguacero, luego el filtro en línea del tinaco Rotoplas, y después filtros de regadera baratos y un filtro de cocina para el agua que se bebe. Un filtro fino en la captación simplemente se tapa con un aguacero. Para agua de beber en específico, fíltrala y analízala bien — que sepa limpia no es lo mismo que esté comprobada como segura.

    ¿El agua de lluvia de un techo de lámina es más limpia que la de uno de concreto?

    En mi experiencia, claramente sí. El agua que escurre de mi techo de lámina es más limpia que la del techo de concreto, así que alimento la cisterna (y la casa) con el techo de lámina, y mando el agua del techo de concreto a un tanque aparte para lavar ropa. El material del techo y el agua que puedes captar son decisiones que van juntas.

    ¿Necesito permiso para un sistema de agua fuera de la red?

    Captar agua de lluvia es una cosa; perforar un pozo profundo es otra — como residente extranjero entendí que necesitaba confirmar el permiso antes de perforar, y el agua está regulada. El manejo de aguas residuales también está sujeto a reglas. Yo trataría todo esto como algo que hay que confirmar con un abogado o la autoridad correspondiente para tu propio terreno, en lugar de suponer — estoy describiendo mi instalación, no la ley.

    Luke Burchell

    Escrito por Luke Burchell

    Gestioné yo mismo la construcción de mi casa en San Cristóbal de las Casas, Chiapas, que funciona fuera de la red con agua de lluvia — captación, una cisterna de 10,000 litros, alimentación por gravedad, y un sistema de aguas residuales que construí a mano. Antes de eso pasé años en trabajo de desarrollo rural en Guatemala. Todo lo de aquí viene de esa experiencia: lo que construí, lo que cambiaría, y lo que planearía antes.

    Read this in English →

    Actualizado · 2026 · San Cristóbal de las Casas, Chiapas

    Específico de una obra fuera de la red en Chiapas — la lluvia, la geología y las regulaciones varían según la región y el año. Nada de esto es asesoría profesional de saneamiento, de seguridad de agua potable, estructural ni legal; confirma cualquier trabajo regulado, como pozos profundos, derechos de agua y manejo de aguas residuales, con alguien calificado para tu propio terreno.

  • Off-Grid Water in Mexico

    Building in Mexico · off-grid water

    Off-grid water in Mexico: how I run a house on rainwater

    Everyone planning rainwater worries about catching enough. On my plot the opposite is true — in a hard downpour I can catch more than I can use in a week, and then nothing falls for months. Off-grid water isn’t really a collection problem. It’s a storage and timing problem.

    PlaceSan Cristóbal, Chiapas
    SourceRainwater, no mains
    Storage10,000 L cistern
    Wastewater3-stage, self-built

    How it works

    My land came with no water connection. So the house runs on rain: caught off the roofs, filtered simply, stored in a buried cistern, pumped up to a roof tank, and fed back down by gravity — with the dirty water filtered again through a system I built by hand. This is what that actually takes, and what living on it is really like.

    What this covers

    This is based on one self-managed build in San Cristóbal de las Casas, Chiapas — not a sanitation design, a drinking-water safety standard or a legal guide to water rights. It’s the off-grid half of the water story: the companion to my water system for a house in Mexico, which covers getting water into and through the house — cistern build, pump, roof tank, gravity feed and the CPVC-vs-TuboPlus pipe choice. This page is about where the water comes from and where it goes afterwards.

    My off-grid water loop at a glance

    Tin roof simple stone filter 10,000 L cistern pump roof tank house wastewater filter soakaway

    up to 5,000 L caught in a day ~1,000–2,000 L/week used 10,000 L cistern 3-stage wastewater no mains connection

    The honest version

    I’m not an off-grid purist — this is about resilience

    Let me be honest about what this is and isn’t. I’m not living a zero-impact dream. I have flush toilets — I broke the off-grid rule about composting — though I fitted the smallest tank I could find and dropped a 600 ml bottle inside it, which brings each flush down to about 3.1 litres. I run a pump on grid electricity. This isn’t ideology; it’s a house with no water connection, made to work on what falls on the roof.

    I spent years on international-development work in rural Guatemala — at one point as an innovation specialist, where I tested a rainwater-storage bag from Africa that sat under a roof like a small tent. Supplying my own family needed something far more robust than that bag, and an off-grid water system is what I settled on.

    The real constraint

    The real problem with rainwater isn’t catching it

    If you’re planning rainwater harvesting in Mexico, the first thing to learn is that catching the rain is the easy part. Before I built anything, I thought rainwater was mostly about collection — point the roof at a barrel and you’re done. Three things turned out to be the real challenge, and only one of them is easy.

    The three challenges of rainwater

    The challengeWhy it’s harder than it looksWhat I did
    Getting the water off the roofRoofs usually aren’t pitched evenly across a flat plane, so runoff doesn’t all arrive where you want it.The easy one — gutters and routing solve it. Plan it into the roof rather than bolting it on later.
    Filtering fast enoughTorrential rain arrives all at once; a fine filter clogs or overflows and you lose the very downpour you wanted to catch.Deliberately under-filter at the catchment — keep flow high, clean the water later in the chain (below).
    Storing it through the dry monthsThis is the real constraint. Rain comes in a few intense months, then little for the rest of the year.Size the cistern for the drought, not the downpour. Storage is everything.

    The third row is the whole game. My tin roof — the one that supplies the house — is about 50 m² (5 × 10 m), and on the heaviest days I can catch up to 5,000 litres from it in a single day. That takes a real tropical storm, though: a millimetre of rain on a square metre is a litre, so 5,000 litres off 50 m² means around 100 mm of rain in a day — which only happens a handful of times a year. After the rains end around mid-November, you’re living on what you stored through October and November, with only a handful of light, infrequent showers until the next wet season arrives in May or June. That long dry stretch is exactly why the first real decision is storage.

    Storage

    Start with storage — it’s the one thing you can’t redo

    Almost everything in an off-grid water system can be adjusted later. The cistern can’t. It’s poured concrete in the ground, and you live with the size you chose.

    Mine is a concrete-lined cisterna holding about 10,000 litres. It works — it has carried a family of four through the dry seasons. But if I were pouring it again I’d go to 12,000–15,000 litres, because the storage is what bridges the gap between the months it pours and the months it doesn’t. Once it’s set, enlarging it means breaking concrete. The build itself — what it cost, how it’s lined — sits in the water system guide alongside the pump and roof tank; here the point is simpler: err bigger. Storage is the cheapest insurance against a long dry season, and the hardest thing to add afterwards.

    A rough way to sanity-check the size

    Work backwards from a dry spell, not from rainfall

    Frugal, we can run on about 1,000 litres a week as a household of four — two quick showers each and reduced-flush toilets, before any clothes washing. Wash clothes regularly and it climbs nearer 2,000. Hold your own figure against the longest dry stretch you need to cover and you get a feel for the storage you need between meaningful rains. It’s back-of-an-envelope arithmetic from one house, not a design calculation — your roof area, climate and habits will move it a lot — but it’s the right question to ask before you pour.

    Filtering

    The mistake is filtering rainwater too finely, too soon

    This is the counterintuitive part: at the point of catchment I filter less, not more. A fine filter is exactly the wrong thing when 5,000 litres wants through in an afternoon — it clogs, backs up, and the rain you were trying to catch runs off the edge.

    So my first-stage filter is deliberately crude: a 50-litre drum with large stones (4–6 inches) at the bottom and smaller ones (around 2 inches) above. No fine media, nothing that chokes the flow. It takes out the leaves and grit and lets the volume through. The cleaning then happens further along the chain, where it doesn’t have to keep up with a downpour:

    My filtering chain — crude first, finer later

    • Plastic drum on the ground — takes out debris, keeps the flow rate high
    • The inline filter that comes with the Rotoplas roof tank — a second pass as water is pumped up
    • Cheap shower filters (from Amazon Mexico) at the point of use
    • A kitchen filter for drinking water

    Catch fast and dirty. Clean slowly and often.

    The quality surprised me. The water leaves no hard-water scale in the showers, sinks or toilets, and to my taste it’s cleaner than the town supply — I’d rather drink it than rely entirely on refilled garrafones. But I’ll be straight: taste isn’t a safety test. I drink mine — mostly as tea, so it’s boiled — and I’ve had no problems, but that’s my experience in my house, not advice. Roof runoff can carry bacteria and whatever’s on your roof. If you’re drinking rainwater, filter and test it properly, and treat the well-permit and water-quality side as something to confirm with someone qualified for your own site.

    Roof routing

    Which roof’s water goes where

    Not all rainwater is equal, and the roof it comes off decides what it’s good for. Water from my lámina (tin) roof is noticeably cleaner than runoff from the concrete roof — so I route them to different jobs rather than mixing them.

    Water by roof — each source to its job

    SourceHow cleanWhat I use it for
    Tin (lámina) roofCleanest runoffFeeds the cistern → pumped to the roof tank → kitchen and bathrooms
    Concrete roofDirtier, more porousRouted to a separate Rotoplas tank for washing clothes
    French drainGround runoff — debrisBuried barrel in the garden for plants and animals

    This is one more reason the roof decision and the water decision are tied together — the material you put overhead changes the water you can collect under it. I get into the wider trade-off in tin roof vs concrete roof in Mexico. It’s also why, if your land has no connection, the roof and the catchment should be planned together from the start, not stitched together afterwards — the same point I make about buying land in Mexico with no water on it.

    Overflow

    Planning for too much water

    The flip side of catching 5,000 litres in a day is that, in the wet season, you have far more than you can store or use — and water you don’t direct deliberately ends up where you don’t want it. The tin roof fills the main cistern; my concrete roof and the French drain can deliver roughly as much again, but the tanks they feed are small — a 1,000- and a 500-litre Rotoplas — so on a big storm day most of that second stream just overflows. A diversion pipe sends the excess out to the street once the tanks are full. So part of an off-grid setup is routing the overflow on purpose — and accepting you’ll lose the rest.

    My approach is low-tech and cheap. I run PVC tubing with taps at the junctions so I can switch the flow different ways — diverting it into a buried garden barrel, for instance, to keep water for the plants and animals. On a slope, French drains do the same job for ground runoff: they feed the same storage rather than letting the water cut channels across your land.

    Wastewater

    The hard part I underestimated: bathroom wastewater

    I assumed the water leaving the bathrooms would be the easy part. I’d read about filtration systems, watched videos, and thought it would be a case of digging, placing tanks, adding filter material and moving on.

    It wasn’t. It became one of the biggest manual jobs I took on during the whole build.

    Rainwater gets most of the attention because it comes off the roof, but the other half of an off-grid water system is what happens after water leaves the house. In my case the bathroom wastewater goes through a three-stage settling and filtration system I built from ordinary hardware-store materials — partly because I couldn’t get many of the materials I saw recommended online. I’m setting it out here as a cautionary example, not a design to copy.

    The first two stages are buried plastic water-storage tanks. The first simply catches and settles the solids. The second I turned into an upflow filter: water is piped in at the very bottom, so the only way out is back up through a bed of filtration stones, held off the tank floor on a raised platform I improvised from upturned buckets. The one thing I’d change is the mesh in that platform — I used steel because it was what I could find locally, but it will rust, and plastic or stainless would last.

    The final stage is a plastic barrel from the market, packed with larger 1–2 inch stone, as a last filter before the water soaks away into the ground — into a pit I backfilled with stone and rubble left over from the construction.

    The first lesson was about the tanks themselves. I went cheap and used standard plastic water-storage tanks rather than reinforced tanks made for burial — and an empty tank in a wet hole does not stay where you put it. To weigh them down while I worked I part-filled them with water; half full felt like more than enough. Then the first heavy downpour of the year filled the excavation overnight, and the next morning I found one tank floating in it, lifted clean out of position. Clearing that up meant bailing the flooded hole by hand, bucket by bucket — the most miserable, grinding stretch of the whole build.

    Two plastic water-storage tanks in a flooded excavation during an off-grid water build in Chiapas, Mexico — one has floated up and tilted after heavy rain
    The morning after the first big downpour of the year: I’d only half-filled the buried wastewater tanks to weigh them down, and one floated up out of the flooded hole overnight. The fix was bailing the water out by hand, bucket by bucket.

    What it taught me is to treat a buried plastic tank as a buoyancy and pressure problem, not just a container. Half-filling mine wasn’t enough — once the hole flooded, the tank still had enough buoyancy to lift out of position, and an empty one could be crushed by saturated soil instead. So if I were doing it again I’d fill it right to the top before backfilling and keep it full until the earth was packed tight around it.

    The second lesson was access. I was improvising as I built, and I hadn’t thought through how I’d do maintenance until the tanks were already in the ground. That became a real problem, because the wastewater pipes from the house ran much deeper than the level of the garden. So I didn’t just need deep holes for the tanks — I needed a way to create an access cavity above them, below garden level.

    In the end I had the builder make a small roof-like concrete structure over the tanks, with two removable concrete slabs for access. Because the whole thing was going to be buried under the garden, I placed large used truck tyres over the access slabs — free from a tyre shop — so I wouldn’t have to dig up the garden every time I needed to get in. Then I put big plant pots inside the tyres, with stones around them, which hid the whole structure completely.

    Two plastic wastewater tanks seated in an excavation and joined with white PVC pipes before backfilling, off-grid water build in Chiapas, Mexico
    The two settling tanks plumbed in and seated, lids on, before backfilling — the first catches and settles solids, the second gives the liquid another stage.
    Reinforced concrete access cap being cast over buried wastewater tanks, with two wooden-framed openings for removable access slabs, Chiapas, Mexico
    The access cap I added afterwards: reinforced concrete poured over the tanks with two framed openings for removable slabs, so I could reach them without digging up the garden.

    It works, but it was a workaround. If I were doing it again, I’d design the wastewater access before digging anything, and I’d avoid sending the drainage so deep into the garden in the first place. That one decision added cost, labour and difficulty to everything that followed.

    Two honest caveats, because this is the part where getting it wrong has consequences. First, if I were building it again I’d probably have a mason build the stages in concrete rather than repurposed plastic tanks — more capacity, especially for solids, and a more durable system overall. Second, I badly underestimated the labour. It took months of digging, moving earth and finding the right rocks for the filtration, and then having a builder create that buried roof around the tanks and pipes. This was not a weekend job.

    Important caution

    Wastewater is a health and regulatory matter

    I’m describing what I built for my own house, not a sanitation design. Bathroom wastewater, greywater and blackwater can be regulated, and mistakes can create health problems. Treat this as one person’s improvised system and confirm the design, distances, maintenance and legal requirements with someone qualified for your own site.

    What I’d change

    What I’d do differently

    I’d pour a bigger cistern — 12,000 to 15,000 litres — because storage is what carries you through the dry season and it’s the one thing you can’t enlarge later. I’d plan the catchment and the roof together rather than treating collection as something to add once the house was up. And I’d accept sooner that the easy-sounding part (catching rain) is trivial next to the parts nobody pictures: storing it, routing the excess, and dealing with what leaves the house.

    Low-water living

    What low-water living actually feels like

    People imagine off-grid water means hardship. Mostly it means attention — and there isn’t a single number, there’s a range. Where you land in it comes down mostly to two choices: how you wash clothes, and what kind of toilet you have.

    Water use per week — where you land in the range

    Scenario (household of four)Roughly per weekWhat it assumes
    Frugal~1,000 litresTwo quick showers each, reduced-flush toilets (~3.1 L), no clothes washing
    With laundry~2,000 litresThe same household, but regularly washing clothes — the big swing
    Compost toilets~1,000 litresToilet savings traded for more frequent showers, still near the frugal figure

    The biggest swing is laundry — washing clothes is genuinely water-intensive, and it’s most of the gap between those columns. Toilets are the other lever: mine are conventional flush cut to about 3.1 litres, but compost toilets would buy back enough to shower more often and still sit near the frugal end. Either way, one thing worth knowing: washing dishes can use as much water as a shower depending on your taps and how you do it, so the savings often hide in the ordinary jobs rather than the obvious ones.

    What you gain in exchange is independence and, honestly, better water — soft, scale-free, and not trucked in. What you give up is the ability to forget about it. You watch the cistern through the dry months the way other people watch a fuel gauge. After a few years it’s just a rhythm, not a chore.

    The rain is the easy part. Everything that decides whether you have water in April happens before the first drop falls.

    FAQ

    Common questions

    Can you really run a house on rainwater in Mexico?

    On my plot in Chiapas, yes — with no mains connection, rainwater off the roofs is my main supply, stored in a 10,000-litre cistern and pumped to a roof tank. Whether it works for you comes down to your rainfall, roof area, storage size and how long your dry season runs. The limiting factor is almost always storage, not how much rain you can catch.

    How much water does a house use per week in Mexico?

    For my household of four in Chiapas, how much rainwater we actually need runs from about 1,000 litres a week when we’re frugal — two quick showers each and reduced-flush toilets, before any clothes washing — up to around 2,000 once we’re regularly washing clothes, which is by far the most water-intensive job. Compost toilets would let you shower more often and still sit near the lower figure. Your own number depends on showers, laundry and toilet type more than anything else.

    How big a cistern do you need to live on rainwater?

    Mine holds about 10,000 litres and has carried a family of four (using roughly 1,000–2,000 litres a week, depending on laundry) through the dry seasons. If I were pouring it again I’d go to 12,000–15,000 litres for more margin. Size it against your longest dry stretch, not against a heavy day of rain — and remember it’s the one part you can’t easily enlarge afterwards.

    How do you filter rainwater for a house?

    I filter crude-first, fine-later: a stone-filled drum at the catchment to keep the flow rate high in heavy rain, then the inline filter on the Rotoplas roof tank, then cheap shower filters and a kitchen filter for drinking. A fine filter at the catchment just clogs in a downpour. For drinking water specifically, filter and test it properly — clean-tasting isn’t the same as tested-safe.

    Is rainwater off a tin roof cleaner than off concrete?

    In my experience, clearly yes. Runoff from my tin (lámina) roof is cleaner than off the concrete roof, so I feed the cistern (and the house) from the tin roof and send concrete-roof water to a separate tank for washing clothes. The roof material and the water you can collect are linked decisions.

    Do I need a permit for an off-grid water system?

    Rainwater catchment is one thing; drilling a deep well (pozo profundo) is another — as a foreign resident I understood I needed to confirm permission before drilling, and water is regulated. Wastewater handling is also subject to rules. I’d treat all of this as something to confirm with a lawyer or the relevant authority for your own site rather than assume — in Mexico, water is regulated federally through CONAGUA. I’m describing my setup, not the law.

    Luke Burchell

    Written by Luke Burchell

    I self-managed the construction of my own house in San Cristóbal de las Casas, Chiapas, which runs off-grid on rainwater — catchment, a 10,000-litre cistern, gravity feed, and a wastewater system I built by hand. Before that I spent years on rural-development work in Guatemala. Everything here is from that experience: what I built, what I’d change, and what I’d plan earlier.

    Read my full story → · Leer esto en español →

    Last updated · July 2026 · San Cristóbal de las Casas, Chiapas

    Specific to one off-grid build in Chiapas — rainfall, geology and regulations differ by region and year. Nothing here is professional sanitation, drinking-water-safety, structural or legal advice; confirm regulated work such as deep wells, water rights and wastewater handling with someone qualified for your own site.

  • Brick vs Block in Mexico

    First-hand · one self-managed build

    Brick, block or thermal block in Mexico: why I used different walls in the same house

    When I built my own house in San Cristóbal de las Casas, Chiapas, I didn’t pick one wall material and use it everywhere. I used brick, standard cement block, tabicón and a lightweight thermal block in different parts of the same house — because the right answer changed from wall to wall, with the sun, the shade, the weight and the budget. Most people ask it as a simple brick vs block question; in Mexico I found the better answer was to choose the material for each wall in turn. Here’s what each one cost, how each feels to live with, and where I’d use each again.

    PlaceSan Cristóbal, Chiapas
    MaterialsBrick · block · tabicón · thermal
    Prices2026 pesos, per unit
    Check locallyPrices vary ~30% by zone

    The short version

    There’s no single best wall material here — there’s a best one for each wall. Standard cement block — the hollow concrete block that’s the default here — is the cheapest wall to build and a solid all-rounder. Brick costs the most per wall (it looks cheap per piece, but you lay far more of them) — its case is looks and comfort, not price. The lightweight thermal block I used is the priciest unit, and I put it on the walls that sit in shade all year. Tabicón sits in the middle.

    If I had to give one rule: match the material to the wall’s exposure — thermal mass (block or brick) where the sun hits, lighter insulating block where it doesn’t — rather than buying one block for the whole house.

    First, what I mean by “thermal block”

    “Thermal block” is a slippery term — internationally it can mean AAC/aerated concrete (Hebel), fired-clay termoarcilla, or various lightweight blocks, and they don’t all behave the same. In this article it means the specific thing I was offered locally in Chiapas: a lightweight block made of pómez (pumice) — porous volcanic stone. That’s why it’s light and mildly insulating (less so than I thought it would be), and it’s not the same product as AAC, Hebel or termoarcilla. Treat everything below as my experience with the pómez block, not a verdict on every “thermal block” sold elsewhere.

    From the actual build

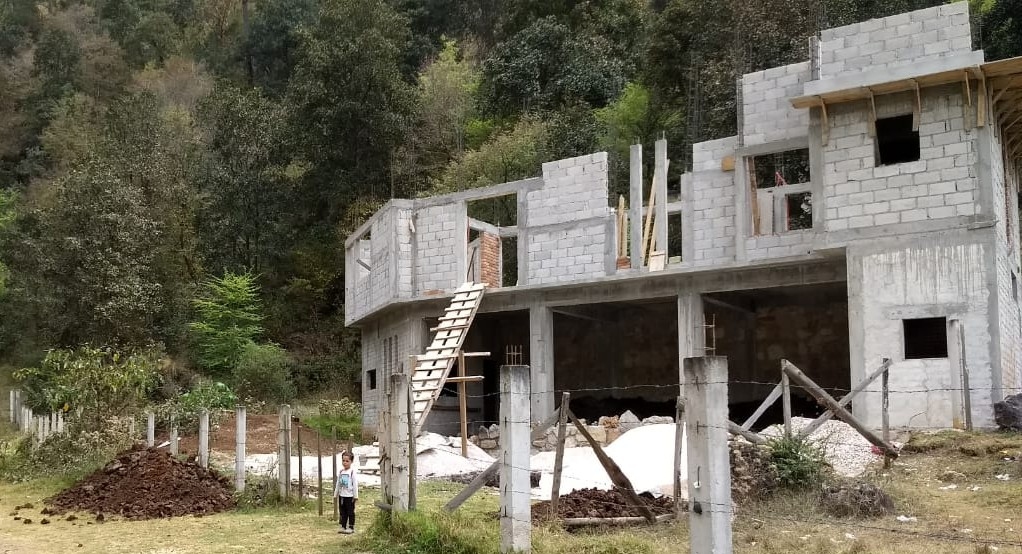
    House under construction in Chiapas, Mexico, showing grey hollow cement block walls, red brick infill panels and concrete columns on a hillside.
    Different wall materials on one self-managed build in San Cristóbal de las Casas, Chiapas — grey cement block, red-brick infill panels and concrete columns in the same house.

    The line-up

    The four wall materials I used

    All four are common in Chiapas, all four went into my house. Prices are 2026 pesos per unit — marks what I actually paid on my build — and note they run up to ~30% cheaper in the zones where the material is actually fabricated. Prices move; check them against a local materialista before you plan around them.

    What each is, and what it cost

    MaterialWhat it isEachSize≈ per m²
    Brick (tabique / ladrillo)Fired clay; small, solid, traditional MX$726×7 cm~45
    TabicónSolid cement brick, bigger than clay brick MX$928×10 cm~30
    Hollow cement blockStandard hollow concrete block — the default here MX$15~40×20 cm~12
    Thermal block (pómez)Lightweight pumice-stone block MX$19~40×20 cm~12

    Those per-m² figures are approximate wall-face calculations from the units I had locally — not manufacturer specs. They assume a 1.5 cm mortar joint; a brick wall runs roughly 3¾ bricks across and 12 courses up per square metre. One more solid block worth knowing: a cement-filled block (a hollow block filled with concrete) behaves much like tabicón in everything below.

    Cost

    Brick vs block cost: the cheapest unit makes the most expensive wall

    Brick is the cheapest piece on the list and the dearest wall to build — that surprised me, and it’s the single most useful thing on this page.

    Look at the per-unit prices and brick (MX$7) looks like the bargain. But you don’t buy a wall by the piece — you buy it by the square metre, and that’s where it flips. A square metre of wall takes about 45 bricks but only ~12 blocks. So even though each brick is half the price of a block, you’re laying nearly four times as many of them — and every one of those extra pieces needs mortar around it and a mason’s time to place it.

    On my build that meant brick walls came out clearly the most expensive: more units, much more cement and sand for all the extra joints, and walling labour that worked out close to double. Standard cement block was the cheapest wall to build, precisely because each piece covers the most and you lay the fewest. Tabicón sits in between. The lightweight thermal block is the priciest unit (MX$19) and covers the same area as a block, so it’s the most expensive of the “big block” options — you’re paying for the pumice, not for coverage.

    What doesn’t change with your choice

    The reinforced-concrete skeleton — the castillos (columns) and cadenas (ties) — is identical whatever you fill the walls with. That’s what stops a brick house from simply costing several times a block one: you’re only paying the difference on the walling units, mortar and labour, not on the structure.

    A reminder on the numbers: these are my 2026 Chiapas unit prices, and brick and thermal block in particular run up to about 30% cheaper near where they’re fabricated. When you compare quotes, ask where each material is actually made, not just the price per piece — a cheaper block loses its edge if it has to travel far, arrives broken, or is hard for your mason to resource. Treat them as a structure to compare with your own local quotes, not a national price list. The full build budget these came from is in the cost to build a house in Mexico breakdown.

    Comfort

    Brick, block and thermal block: how each one feels to live with

    This is the part you can’t get from a spec sheet, and the reason I didn’t just build the cheapest wall everywhere. I have all four materials on adjacent walls of the same house, in the same climate — so this is a like-for-like comparison of how they feel through a warm Chiapas day and a cold night.

    Warm day vs cold night

    MaterialWarm dayCold night
    BrickWarms and cools gradually; evens out the day.Holds a little warmth; the kindest to the touch of the four.
    Hollow cement blockA touch cooler than brick.Cools very quickly. Very cold by morning.
    TabicónWarms up in direct sun; very cold in shade. Even in sun, cooler than brick.Icy to the touch — but if it caught the day’s sun, it holds that warmth into the evening better than hollow block.
    Thermal block (pómez)Warms up only a little.Surprisingly similar to hollow block.

    The headline is that brick simply feels better to live with — cement block is noticeably cold to the touch, while brick absorbs and releases heat gently and takes the edges off both hot afternoons and cold mornings. That comfort, not cost, is the real reason to choose brick.

    The thermal block surprised me — and not the way I expected

    I’d assumed the pómez “thermal” block would feel noticeably warmer on a cold night. It doesn’t — those walls feel much like the hollow-block ones. Its job isn’t to store warmth (it’s light and low-mass) but to slow heat moving through the wall. So it earns its place on walls where you’re trying to stop warmth leaking out, not where you want a wall to soak up the day’s sun and radiate it back. Honest verdict: useful, but a quieter benefit than the name suggests.

    Weight

    Weight, structure and an earthquake zone

    As a rough rule on my build, the heavier units felt more substantial — but they also put more weight into the structure holding them up.

    A rough rule that helped me: heavier units (block, tabicón, brick) have more load-bearing capacity, but they also need a stronger structure to hold them up, which matters most on upper floors. The pómez thermal block is the odd one out here — it’s much lighter than cement block because it’s pumice. Living in an earthquake zone, I found it genuinely reassuring to have the lighter block high up in the house: less mass overhead is less to move in a quake. If I were choosing again, I’d be quicker to spend on the lightweight pómez block high up — where the weight saving counts most — than on a sunny ground-floor wall, where the mass of block or brick is actually useful.

    Load-bearing capacity and structural design differ between these materials and with your own layout — this is my lived experience, not engineering advice. Confirm anything structural, especially on upper floors or a slope, with someone qualified for your build.

    Finish

    Render, exposed brick, and a cost you can claw back

    Most walls here get a cement render (aplanado) inside and out, and it’s one of the bigger line items late in the build. That’s where brick claws back some of its extra cost: brick doesn’t have to be rendered if you like the look of exposed brick, so a brick wall can be both the finish and the structure at once. I’ve used it that way as an interior feature — practical and good-looking, and you skip a whole render bill on that wall.

    The render choice: lime mix or pure cement?

    On the exterior you have a budget choice. A pure sand-and-cement render (no lime) is more water-resistant and needs no paint, which saves you both paint and the labour of painting — but it’s far more prone to cracking, and it doesn’t let the wall breathe. A 50% lime mix breathes and cracks less, which matters through San Cristóbal’s humid rainy season, when a wall that can’t breathe is more prone to trapping damp — but it does need painting.

    And if you go with lime, there’s no rush on the paint: it can go on long after the render. Leave that decision — the cost, and choosing the perfect colour — for when the budget allows.

    The decision

    Which wall gets which material

    This is the whole point of the page: I matched the material to what each wall had to do. Here’s the logic I used, and would use again.

    Before you choose, ask of each wall

    • Does this wall get direct sun, or is it in shade all year?
    • Is it upstairs or carrying extra weight?
    • Will it be rendered, painted, or left exposed?
    • Is it a bedroom or living room where a cold wall matters?
    • Is the material fabricated nearby, or trucked in from another zone?

    Sun-exposed walls

    Thermal mass — block or brick

    Walls that catch the sun want mass that can soak up the day’s heat and release it through the cold San Cristóbal evenings. Standard cement block does this; brick does it and feels nicer.

    Year-round shade

    Lightweight thermal (pómez)

    Walls that never get sun aren’t going to store heat anyway, so the job is to slow heat escaping. That’s where the lighter pómez block earns its place — and its low weight is a bonus upstairs.

    Walls you’ll see and feel

    Brick

    Where comfort and looks matter — a room you live in, a feature wall — brick’s gentle warmth and the option to leave it exposed (no render) make it worth the higher walling cost.

    For everything else — the bulk of a normal house — standard cement block is the sensible default: cheapest to build, quick, and a perfectly good wall. I treated the other three as deliberate choices for specific walls, not as a whole-house material.

    Decide this before the plumbing and wiring go in

    Choosing materials wall by wall isn’t only about looks — it affects what you order, what gets rendered or left exposed, and where the plumbing and electrical chases can run. Settle the wall plan before those routes go in, not after. More on that in managing your own house build.

    In hindsight

    What I’d do differently

    Two things. First, I’d plan the wall materials room by room from the start — sun exposure, shade, and which rooms actually need to stay warm — instead of deciding wall by wall as the build reached each one. The thinking is the same; doing it up front would have been cheaper to order and simpler to manage.

    Second, my bedroom is built from hollow cement block and it’s freezing in winter. The fix I have planned isn’t to rebuild it — it’s to add external insulation to the outside of that wall, which slows the heat loss without losing the wall’s mass. If a room has to be warm and it’s already block, insulating the outside is usually easier than changing the wall.

    Questions

    Common questions

    Is brick or block cheaper for building a house in Mexico?

    Standard cement block is cheaper to build a wall with, even though a single brick costs less than a block. You lay about 45 bricks per square metre versus ~12 blocks, so brick means far more units, far more mortar, and roughly double the walling labour. On my Chiapas build brick was clearly the more expensive wall — its advantage is comfort and looks, not cost.

    What is a “thermal block” (block térmico) in Mexico?

    The one I used is a lightweight block made of pómez — pumice, a porous volcanic stone — which makes it light and mildly insulating. Be careful with the term: “thermal block” elsewhere can mean AAC/aerated concrete (Hebel) or fired-clay termoarcilla, which behave differently. Ask exactly what a supplier means by it locally.

    What’s the difference between tabicón and a hollow block?

    Tabicón is a solid cement brick (about 28×10 cm); a hollow block is the bigger, hollow concrete unit (about 40×20 cm) that’s the default here. The block covers more wall per piece, so it’s quicker and cheaper to build with; tabicón is smaller and denser. In how it feels day-to-night, tabicón behaves much like a cement-filled block.

    Which wall material is best for a cold climate?

    It depends on the wall. For walls that get sun, thermal mass — cement block or brick — soaks up daytime heat and releases it at night, which helped in the cold San Cristóbal winters. For walls in permanent shade, a lighter insulating block (the pómez “thermal” block) slows heat escaping. Brick feels the warmest to the touch of the four. There isn’t one “warmest” material — there’s a best one per wall.

    Do I have to use the same block for the whole house?

    No — and I didn’t. I used brick, cement block, tabicón and pómez thermal block in different parts of one house, matched to each wall’s sun and shade. Standard cement block is the sensible default for most of a house; the others are worth choosing deliberately for specific walls.

    Is thermal block worth it?

    In my experience, on the right wall. The pómez block didn’t make cold nights noticeably warmer — its benefit is slowing heat loss, not storing warmth — so it earns its place on shaded walls and high up, where its light weight also helps in an earthquake zone. I wouldn’t pay the premium to use it across a whole house.

    Is tabicón the same as brick?

    No. In local use, brick (also tabique or ladrillo) is the small fired-clay unit; tabicón is a larger, solid cement brick. They look related but they’re different materials, and they cost and behave differently — as the tables above show.

    Is the pómez thermal block the same as Hebel or AAC?

    No. The block I used is made of pómez — pumice, a porous volcanic stone. AAC / aerated concrete (sold under names like Hebel) and fired-clay termoarcilla are different products that perform differently. If a supplier offers a “thermal block,” ask exactly what it’s made of before comparing it to anything here.

    Luke Burchell

    Written by Luke Burchell

    I built and managed my own house in San Cristóbal de las Casas, Chiapas, using four different wall materials on the same house. The prices and the comfort comparisons here are from that build — what each one cost me, how each feels to live with, and where I’d use each again.

    Read my full story →

    Last updated · July 2026 · San Cristóbal de las Casas, Chiapas

    First-hand experience from one self-managed build, shared so you can choose wall materials from real lived comparison instead of a spec sheet. Specific to Chiapas — prices, climate and the best choice differ by region and year. Nothing here is professional building, structural or engineering advice; confirm anything structural with someone qualified for your own site.

  • Gestionar la obra de tu casa en México

    De primera mano · una obra autogestionada

    Cómo gestionar la construcción de tu casa en México: 10 cosas que aprendí en obra

    Me hice cargo de la construcción de mi casa en San Cristóbal de las Casas, Chiapas — coordinando los materiales y a los albañiles, y corrigiendo los errores yo mismo, mientras trabajaba de tiempo completo. Esto no es una guía genérica de construcción. Son las cosas prácticas que solo se aprenden cuando eres el responsable de pedir el material, revisar el trabajo y mantener la obra avanzando.

    LugarSan Cristóbal, Chiapas
    ObraAutogestionada, por etapas
    Útil paraQuien lleva su propia obra
    VerificaPrecios y prácticas varían

    La versión corta

    Gestionar tu propia obra te puede ahorrar bastante dinero — pero el ahorro no es gratis. Lo pagas con tu atención. Te conviertes en el responsable de los materiales, los tiempos, el control de calidad y las decisiones del día — el trabajo que normalmente haría por ti un maestro de obra o un contratista. Gestionar no significa poner tú todos los blocks. Significa estar lo bastante cerca de la obra para que un problema chico no se vuelva caro. Estas son las diez lecciones que me costaron tiempo y dinero aprender.

    De la obra real

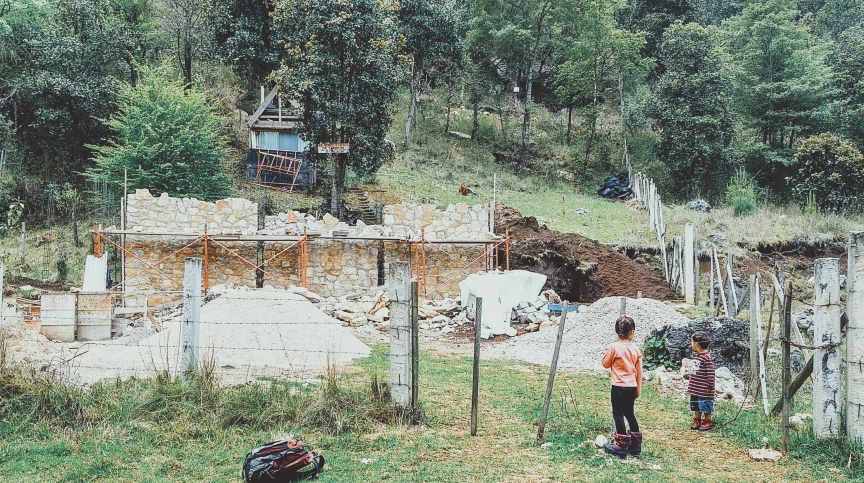
    Casa en construcción con muros de piedra, columnas de concreto, andamios y materiales en una ladera cerca de San Cristóbal de las Casas, Chiapas.
    Mi propia obra en San Cristóbal de las Casas, Chiapas — donde gestionar significó pedir materiales, revisar avances y detectar errores antes de que se volvieran caros.

    Primero, lo básico

    ¿Qué significa gestionar tu propia obra?

    Cuando digo que gestioné mi propia obra, no significa que yo puse cada block ni colé cada losa. Contraté albañiles y pagué a gente con oficio para lo que sabía hacer. La diferencia es que no le entregué todo el proyecto a un arquitecto, un contratista o un maestro de obra para esperar la casa terminada.

    Yo era quien pedía los materiales, revisaba qué se había acabado, comparaba precios, preguntaba por qué se hacía algo de cierta manera y decidía qué podía esperar. Eso me dio más control sobre el presupuesto — pero también significó que las demoras y los errores eran míos para detectarlos a tiempo.

    Esta página trata de ese punto medio: no hacerlo todo tú, pero tampoco desaparecer de la obra.

    Gestionar la obra no significa hacerlo todo con tus manos. Significa que tú eres quien consigue, decide, revisa y empuja el trabajo para que la obra no avance a ciegas.

    De un vistazo

    Las diez lecciones, y por qué importa cada una

    Cada lección es algo que hice mal, aprendí tarde, o solo entendí después de ya haberlo pagado.

    Resumen

    LecciónPor qué importa cuando tú llevas la obra
    1. Controla tú el materialEl precio de arena, grava y cemento puede variar ~15% según el contacto — y son de los materiales de mayor volumen.
    2. Planea las ampliaciones antes de colarDejar varilla saliente hoy es gratis; unir concreto después es una junta débil que filtra.
    3. Define el estándar del aplanadoDecide la mano de obra, el material, y si el aplanado sigue pegado en dos años.
    4. No dejes que los clavos reciclados frenen la obraPagar mano de obra por enderezar clavos cuesta más que los clavos.
    5. Guarda bien el cemento en lluviasEl cemento húmedo es dinero tirado.
    6. Colado a mano vs revolvedora con plumaCuesta casi lo mismo; cambia la velocidad, el desmadre y la confianza en la mezcla.
    7. Ten plástico listo antes de colarUna losa que se seca muy rápido al sol se agrieta — y no hay vuelta atrás.
    8. Aprende a usar el termofusorUna herramienta de ~$400 te deja terminar tú mismo la plomería.
    9. Aplana el exterior durante la obra, no despuésHacerlo años después es limpiar cemento de puertas, ventanas y pisos ya terminados.
    10. Elige el muro por cómo se viveEl confort térmico se siente todos los días, no solo en la cotización.

    Lección 01

    Controla tú el material — y cuéntalo cada tarde

    Quien controla tus contactos de arena, grava y cemento controla una buena parte de tu presupuesto.

    La arena y la grava se compran por camionada. Mi primer albañil me preguntó si yo me encargaba de pedirlas; no sabía a quién llamar, así que quedamos en que él. Después entendí dos cosas. Al cambiar de albañil, el precio de estos materiales podía moverse como un 15% según el contacto — bastante, siendo de los materiales de mayor volumen de toda la obra. Y tener mi propio proveedor la segunda vez se sintió bien: le demuestra al albañil que sabes lo que haces. Hasta me han pedido mi contacto cuando les digo el precio que pago.

    Las ferreterías chicas, que no son de cadena, a veces crecen como distribuidoras de cemento y suelen ser más baratas que las grandes — aunque tardan más en entregar. Compra el cemento por tonelada y la varilla por volumen: ahorras en los dos.

    La otra mitad de la lección, y la que más repetiría: revisa la arena, la grava y el cemento al final de cada día. Si tú llevas la obra, los albañiles no te van a avisar hasta que ya se acabó, con la gente parada. Pide con al menos un día de anticipación; pide a media tarde para que el material tenga más chance de llegar antes del mediodía siguiente. Cuando estén armando los castillos y las cadenas, lo mismo con el alambrón, el alambre y los clavos.

    Por qué es la lección número uno

    Quedarse sin material es la forma más común de perder días en una obra que llevas tú — y de pagar gente parada. El remedio no cuesta nada: una vuelta de cinco minutos cada tarde y una llamada.

    Lección 02

    Planea las ampliaciones antes de colar

    El momento más barato para planear una ampliación es antes de colar la primera losa — y es gratis.

    Construí mi casa en dos etapas, así que me ha tocado unir concreto nuevo a uno ya existente. Hay dos cosas que conviene saber antes. Primero, si amarras una cadena nueva a una columna ya colada, es una unión débil. Algunos albañiles se niegan a hacerlo; otros lo hacen sin pensarlo. No te quedes con ninguna de las dos: pregúntale a un ingeniero.

    Segundo, si ya sabes que vas a ampliar una losa después, pide que dejen varilla saliente de la cadena, perpendicular y lista, para poder unir la losa nueva estructuralmente. No cuesta nada ahora y es casi imposible de hacer después.

    La advertencia que aprendí a las malas

    Unir una losa de concreto nueva a una existente tiende a filtrar agua y humedad por la junta, por más cuidado que pongas. Yo estoy poniendo teja a lo largo de donde se juntan mis dos losas para que no entre la humedad. Planea que la junta sea un punto débil y resuélvela desde el diseño.

    Lección 03

    Define el estándar del aplanado antes de aceptar el precio

    “Aplanado” puede significar dos muros muy distintos — y el más barato no queda derecho.

    Tuve dos estándares de aplanado claramente distintos, de diferentes albañiles. En el primero, se aplana a plomo y se usa el reventón con disciplina, así que el muro queda derecho y a nivel en todo su largo. En el segundo, no se logra una superficie pareja a lo largo del muro. El segundo es más rápido, más fácil y gasta menos material — sobre todo donde el muro no está a plomo, porque el albañil no compensa con más mezcla. A los dos se les llama “aplanado”. Siempre pregunta cuál estás cotizando, o cuál te están dando — cambia mucho la mano de obra y cómo se ve la casa terminada.

    Hay una segunda plática que conviene forzar, y es sobre la adherencia. El aplanado no pega bien sobre el concreto liso, y los castillos y las cadenas casi siempre quedan lisos. En Guatemala los albañiles pican la superficie con cincel para que el aplanado agarre; en Chiapas, en mi experiencia, eso se salta o se hace a medias. Hazlo un punto explícito: “¿cómo te vas a asegurar de que el aplanado no se caiga en uno o dos años?”

    Lección 04

    No dejes que los clavos reciclados frenen la obra

    Reciclar está bien — menos los clavos en una obra activa.

    Estoy a favor de reciclar y nunca lo discutiría en general. Pero todos los albañiles que he contratado se ponen a sacar clavos viejos de la madera y a enderezarlos para la siguiente etapa antes de pedir nuevos. Esa es mano de obra que estoy pagando, con tal de ahorrarme unos clavos que de por sí son baratos. Compra los clavos. Los viejos se pueden reciclar después del proyecto — cuando ya no están deteniendo tu obra.

    Lección 05

    Guarda bien el cemento en temporada de lluvias

    El cemento a granel es un ahorro — hasta que le entra la humedad.

    Si compraste cemento a granel para ahorrar, protégelo, sobre todo en lluvias. Mantenlo sobre tarimas, no en el piso, bajo techo, y cúbrelo con plástico — más aún si vas a tardar un par de semanas en usarlo todo. El cemento húmedo es dinero que ya tiraste. (Es una de varias razones para tener plástico en la obra antes de necesitarlo — ver la lección 7.)

    Lección 06

    Colado a mano o con revolvedora y pluma: por qué cambié

    La mayoría de las losas en Chiapas se cuelan a mano. Mi entrepiso lo colaron cargando botes de concreto. Cuando le agregué cuartos a la parte de atrás, pagué una olla revolvedora con bomba sobre una pluma. Esto fue lo que vi.

    Pensé que el precio iba a decidir — no fue así. Coticé las dos opciones y quedaron dentro de un 6% una de otra (y hasta eso es difícil de calcular, porque un colado a mano puede dejarte mezcla sobrante). En costo, es un empate. Las diferencias reales estaban en todo lo demás:

    FactorGanaLo que vi
    VelocidadRevolvedora y plumaUnos 45 minutos, contra unas 3 horas a mano (según el tamaño de la losa).
    Desmadre y mano de obraRevolvedora y plumaUn colado a mano son 15–20 personas dando vueltas en la obra mojada — a quienes luego les das de comer — y limpieza al día siguiente.
    La cimbraColado a manoLa pluma deja caer el concreto desde arriba, así que la cimbra de madera tiene que ir más reforzada.
    Confianza en la mezclaRevolvedora y plumaA mano, con tanta gente mezclando, la proporción varía y en lluvias se mete lodo a la mezcla. Confié más en la revolvedora.

    Una aclaración honesta

    ¿Cuál de mis losas se agrietó? La de la revolvedora. Pero dudo que haya sido la mezcla — lo más probable es un movimiento en la estructura de apoyo y el sol intenso justo después del colado (ver la lección 7). Aun así elegí la revolvedora la segunda vez, y lo volvería a hacer.

    Lección 07

    Ten plástico listo antes de colar

    Una losa cura mientras se mantiene húmeda. Al sol directo, no puede — a menos que lo hayas previsto.

    Si cuelas una losa — y puede que te toque hacer parte tú mismo — cúbrela, sobre todo si el techo o el piso queda al sol todo el día. Algo que hacen en Guatemala y que no he visto en México es levantar un bordito de mezcla en la orilla de la losa al colarla, para encharcar agua encima y mantenerla húmeda mientras cura. Mi losa quedó al descubierto y, por más que traté de mantenerla mojada, es casi imposible sin algo que detenga el agua. El plástico le da sombra del peor sol y ayuda a retener la humedad. Ojalá lo hubiera hecho.

    Cuando no estás curando una losa, esos mismos plásticos sirven: para tapar los bultos de cemento (lección 5), y para proteger lo que no quieres manchar — ladrillo, piedra, pisos ya puestos — mientras aplanas.

    Lección 08

    Aprende una habilidad sencilla: el termofusor

    Por unos $400 puedes hacer tus propias uniones de plomería. No hay habilidad de construcción con menos barrera de entrada.

    Puedes comprar un termofusor chino en Amazon — como yo — por unos $400, y funcionan perfecto. No hay habilidad de construcción y mantenimiento más barata ni más fácil de aprender que unir tubería de agua de ½”. En YouTube están los pocos pasos básicos, puedes practicar por casi nada, y como mínimo te deja terminar tú las conexiones del baño y la cocina cuando instales los lavabos y el WC.

    Lección 09

    Aplana el exterior durante la obra, no años después

    Aplanar es un trabajo sucio. Hazlo antes de que haya algo terminado que arruinar.

    El exterior de mi casa lo aplané dos años después de terminar lo demás, porque en su momento no me alcanzaba el presupuesto. No me arrepiento de haber esperado — pero no es una buena experiencia. Aplanar es un desmadre, con cemento volando por todos lados; hasta el gato se aleja cuando los albañiles están en eso. Hacerlo tarde significó limpiar cemento de puertas y ventanas ya puestas, y andar cuidando las pisadas y las salpicaduras sobre las lajas del jardín. Si de plano puedes aplanar el exterior mientras la obra todavía está en bruto, hazlo — tus puertas, ventanas, andadores y cochera te lo van a agradecer.

    Lección 10

    Elige el material del muro por cómo se vive, no solo por el precio

    Usé block hueco, tabique, block de cemento (tabicón) y block térmico en muros contiguos de la misma casa — así que puedo comparar no las fichas técnicas, sino cómo se sienten al vivir en ellos durante un día caluroso y una noche fría en Chiapas. Aquí hablo del confort; para cuál salió más barato, ese es otro tema.

    Primero una regla útil: entre más pesado el material, más carga aguanta, pero más fuerte tiene que ser la estructura que lo sostiene — lo que más importa en los niveles altos. Dejando el peso de lado, así se siente cada uno:

    Cómo se siente cada muro, de día y de noche

    Material del muroDía calurosoNoche fría
    Block hueco de cementoUn poco más fresco que el tabique rojo.Se enfría muy rápido. Muy frío en la mañana.
    Tabicón (de cemento)Se calienta si le da el sol; muy frío a la sombra. Aun con sol, más fresco que mis muros de tabique rojo.Helado al tacto — pero si se calentó con el sol del día, mucho más cálido que el block hueco.
    Block relleno de concretoIgual que el tabicón.Igual que el tabicón.
    Block térmicoSe calienta solo un poquito.Se siente muy parecido al block hueco.

    La sorpresa en mi propia casa: la ventaja del block térmico para conservar el calor en las noches frías no es tan evidente como esperaba — esos muros casi siempre se sienten fríos, muy parecido al block hueco. Pero lo usé a propósito. Los muros que están a la sombra todo el año son de block térmico, donde el trabajo es frenar que el calor se escape de la casa, no atrapar el sol. No puedo afirmar con honestidad que haga una diferencia enorme, pero creo que ayuda — y si tuviera una chimenea, esperaría que ayudara a que el calor no se escape por los muros exteriores mejor que las otras opciones. Viviendo en zona sísmica, también tranquiliza que el block térmico, en lo alto de la casa, sea mucho más ligero que el block de cemento.

    Lo que haría después

    El muro de block hueco de mi recámara es helado en invierno, así que tengo pensado ponerle aislamiento térmico por fuera. Si volviera a empezar, pensaría el material muro por muro — exposición al sol, sombra, y qué cuartos de verdad necesitas calientes — en vez de elegir un solo block para toda la casa.

    Esto es experiencia de vivirlo, no asesoría estructural — la capacidad de carga cambia entre estos materiales, así que confirma lo estructural con alguien calificado para tu propio diseño.

    Guárdate esto

    La revisión de cada tarde

    El único hábito que más días me ahorró. Da una vuelta por la obra cada tarde y revisa que tengas suficiente de esto para mañana — y pide a media tarde si no.

    • Arena y grava — por camionada; tu propio contacto, no el del albañil
    • Cemento — y que esté sobre tarimas, bajo techo y cubierto
    • Varilla — y, al colar castillos y cadenas, alambrón y alambre
    • Cal — para la mezcla del aplanado
    • Clavos — cómpralos; no pagues mano de obra por enderezar viejos
    • Plástico — para curar la losa, tapar el cemento y proteger del salpicado

    Nada de esto lo va a llevar el albañil por ti. Te avisan cuando ya se acabó — y para entonces la obra ya se paró.

    Conoce los límites

    Cuándo sí conviene un profesional

    Gestionar tu obra es controlar materiales, dinero y avance — no pasar por encima de quien sabe más que tú. Hay decisiones que yo no tomaría por mi cuenta.

    En todo lo estructural o de seguridad vale la pena pagar asesoría, incluso en una obra apretada que llevas tú:

    • La cimentación — sobre todo en pendiente o terreno malo; un estudio de suelos
    • Las losas y la junta entre concreto nuevo y viejo (lección 2)
    • Las ampliaciones estructurales — consulta a un ingeniero antes de unir
    • El drenaje y el manejo correcto del agua
    • Los planos estructurales, sanitarios y eléctricos
    • La licencia de construcción de tu municipio

    Llevar la obra yo mismo me ahorró dinero real, pero funciona porque supe dónde se acababa mi criterio. La idea no es hacerlo todo — es ser quien decide, consigue y revisa, y pagar el conocimiento justo donde el riesgo es mayor.

    Preguntas

    Preguntas frecuentes

    ¿Cómo se gestiona la construcción de tu propia casa?

    No significa poner tú cada block: significa ser el responsable de pedir el material, revisar lo que se acaba, comparar precios, cuidar la calidad y mantener el avance — el trabajo que normalmente haría un maestro de obra. Te ahorra dinero, pero lo pagas con tu tiempo y atención. Si puedes estar seguido en la obra y dispuesto a aprender sobre la marcha, es muy factible; si no, te conviene un maestro de obra.

    ¿Conviene construir sin maestro de obra?

    Es lo que yo hice, contratando albañiles directo y pagando por semana. Conviene si vives cerca, puedes estar seguido en la obra y hablas con la gente para empujar las decisiones. Lo que ahorras es real, pero te vuelves responsable de los materiales, los tiempos y de detectar los errores. Si no puedes estar presente, un maestro de obra mantiene la obra avanzando sin ti — a cambio de su costo.

    ¿Qué materiales debo revisar a diario en la obra?

    Arena, grava, cemento, varilla y cal — y, mientras cuelan castillos y cadenas, también alambrón, alambre y clavos. Da una vuelta cada tarde y pide a media tarde lo que falte, para que tenga más chance de llegar antes del mediodía del día siguiente. El albañil no te lleva el inventario; te avisa cuando ya se acabó.

    ¿Cuál es el error más común al construir tu propia casa?

    Quedarse sin material. Es la forma más común de perder días en una obra autogestionada, y deja parada a la gente que estás pagando. El remedio casi no cuesta: una revisión diaria y pedir con un día de anticipación. Después de eso, los errores caros más comunes son aceptar un aplanado sin definir el estándar, y no curar bien una losa recién colada bajo el sol.

    ¿Se puede construir una casa por etapas?

    Sí — yo construí la mía en dos etapas, y muchas casas aquí se levantan poco a poco, conforme alcanza el dinero. La clave es preverlo antes de colar: pide que dejen varilla saliente de las cadenas donde se vaya a unir una losa futura. Ten en cuenta que la junta entre concreto nuevo y viejo tiende a filtrar agua, así que resuélvela bien (yo le pongo teja encima), y consulta a un ingeniero antes de amarrar cadenas nuevas a columnas existentes.

    ¿Autoconstrucción es lo mismo que gestionar tu propia obra?

    No exactamente. Mucha gente usa “autoconstrucción” para hablar de construir tu propia casa, pero no siempre significa poner tú mismo cada block. En mi caso, yo no hice toda la mano de obra: contraté albañiles y gente con oficio. Lo que sí hice fue gestionar la obra — pedir materiales, revisar avances, comparar precios, tomar decisiones y detectar errores antes de que se volvieran caros.

    Luke Burchell

    Escrito por Luke Burchell

    Gestioné yo mismo la construcción de mi casa en San Cristóbal de las Casas, Chiapas — coordinando a los albañiles, los materiales, el sistema de agua y parte de la plomería que aprendí a hacer, viviendo en la zona y trabajando de tiempo completo. Todo esto viene de esa obra: lo que de verdad aprendí haciéndolo, para que te ahorres lo que a mí me costó tiempo y dinero.

    Actualizado · 2026 · San Cristóbal de las Casas, Chiapas

    Lecciones de primera mano de una obra autogestionada, compartidas para que planees la tuya con experiencia real en vez de adivinanzas. Específicas de Chiapas — las prácticas, los precios y las mejores decisiones cambian según la región y el año. Nada de esto es asesoría profesional de construcción, estructural o legal; confirma todo lo estructural o de seguridad, y cualquier permiso, con alguien calificado para tu propio caso.

  • Architect, Maestro de Obra or Self-Manage

    First-hand · one self-managed build

    Architect, maestro de obra or self-manage: who should run your house build in Mexico?

    There are three ways to run a build here, and the real difference isn’t only cost — it’s who notices the problems, who makes the decisions, and who pays for the mistakes. I built my own house in San Cristóbal de las Casas, Chiapas: I self-managed it and worked with masons directly, I had plans drawn up by an architect, I’ve contracted maestros de obra, and I watched neighbours build with architects. So I’ll be clear throughout about what’s first-hand and what I observed.

    PlaceSan Cristóbal, Chiapas
    VantageSelf-managed; architect plans + maestros
    The choiceWhich risk you take on
    Check locallyRules & practice vary

    The short version — which risk are you choosing?

    Choosing who runs your build is a bit like choosing where to jump from. Every route charges you somewhere: the architect in money, the maestro in attention, doing it yourself in time and stress.

    Architect-led

    The springboard

    The most structure and support, the least exposure. Makes most sense for a complex design, a difficult or hillside site, a tighter timeline, or if you can’t be on site often enough to catch problems yourself.

    Maestro-led

    The high board

    A working lead builder, but more riding on the person. The middle road if you can visit the site, but not every day — and worth vetting carefully.

    Self-managedMy route

    The cliff dive

    The most control and the most exposure. Masons paid as you go: the most savings, and the most learning — but also the most time, stress and responsibility.

    Whichever route you choose, confirm who’s responsible for the structural design — not just who’s drawing the plans.

    From the actual build

    A half-built stone-walled house with concrete columns, scaffolding, gravel piles and materials on a wooded hillside near San Cristóbal de las Casas, Chiapas.
    My own self-managed hillside build near San Cristóbal de las Casas, Chiapas — where the real question was not just who did the work, but who was there to notice problems before they were built in.

    Terms used on this page

    Arquitecto
    Architect — may draw, permit, supervise or manage, depending on the agreement.
    Maestro de obra
    Lead builder / site foreman, usually from a mason background, who runs the crew. On site you’ll almost always hear it pronounced “maistro” — that’s the word to listen for.
    Albañil
    The mason doing the physical building work.
    Castillo
    A reinforced-concrete column; here, one with a rebar cage tied by hand on site.
    Armex
    Factory-made electro-welded reinforcement, lighter than a hand-tied castillo.

    At a glance

    The three routes, side by side

    The cost figures are planning multipliers off a self-managed baseline, drawn from my own build and the same figures behind my cost estimator — not universal facts. Treat them as a starting point and adjust for your design, site and the person you hire.

    Architect

    Springboard

    Cost
    ~+25%
    Best for
    Complex design, difficult site, limited site visits
    Risk
    You still need to know who owns the structure

    Maestro de obra

    High board

    Cost
    ~+20%
    Best for
    A clear design, regular visits, a well-vetted builder
    Risk
    Quality depends heavily on the person

    Self-manage

    Cliff dive

    Cost
    Baseline
    Best for
    Living nearby, enough Spanish, controlling cost
    Risk
    Every mistake is yours to catch

    The fuller comparison

    RouteCostControlSpeedWhere it bites youBest for
    Architect
    Springboard
    ~+25% Lowest — you delegate Can be fast Savings can come from places you don’t see, including the structural spec; you still need to understand what’s specified Complex or ambitious design, difficult/hillside site, tight timeline, limited site visits
    Maestro de obra
    High board
    ~+20% Shared Depends on how you pay Quality rides heavily on the individual; design changes cost extra A clear design, when you can visit but not daily, and can vet the person properly
    Self-manage
    Cliff dive
    Baseline Highest — it’s all yours Often the slowest Every detail and every mistake is yours to catch; time and stress Living nearby, enough Spanish to push decisions, cost mattering more than convenience

    “Architect-led” vs paying for plans

    When I say architect-led here, I mean more than paying for drawings: a route where the architect or their team plays a real role in designing, coordinating or supervising the build. You can also hire an architect for the plans and still self-manage the work yourself — which is partly what I did. They’re different decisions, and the cost and control change with each.

    These percentages are why my build cost estimator has a “who manages the work” setting — self-managing is the baseline, a maestro adds roughly a fifth, an architect-led route a little more. The money you save self-managing is real, but you pay it back in your own time and attention.

    The decision aid

    How I’d choose now

    No single route is right for everyone — it depends on how much of your own time and attention you can put in, and how much risk you want to carry yourself. The rest of this page is the experience behind these cards.

    Architect

    Choose if…

    • The design is complex or ambitious
    • The site is difficult or on a slope
    • You cannot be on site regularly
    • You want permits and plans handled
    • You’d rather delegate than oversee

    Maestro de obra

    Choose if…

    • You want a practical lead builder
    • You can visit sometimes, not daily
    • You have a clear design already
    • You can vet the person properly
    • You want speed over hands-on control

    Self-manage

    Choose if…

    • You live near the site
    • You speak enough Spanish to push decisions
    • You can visit often
    • Saving money beats convenience
    • You’re willing to carry the stress

    The hidden core

    The looser the agreement, the more the risk falls back on you

    Underneath the labels, the real question on every build is the same: who owns each job? The more loosely that’s agreed, the more of it lands on you by default — whether you meant to take it on or not.

    Who carries each responsibility

    ResponsibilityArchitect-ledMaestro de obraSelf-managed
    Buying materialsTheir teamUsually the maestroYou (and your own supplier contacts)
    Coordinating workersArchitectMaestroYou
    Catching mistakes & reworkShared — you still overseeMaestro, but you must spot itYou
    Details: lighting, plumbing routes, finishOnly if specifiedHit or missYou
    Structural decisionsConfirm an engineer owns itBuilder conventionYou coordinate it — get engineering advice where needed
    Schedule & delaysArchitectDepends on payment modelYou
    Price changes & overrunsMay absorb — then economiseOften passed to you for changesYou

    Read the right-hand column and you can see why self-managing is cheaper: you’re personally absorbing every row. Read across and you can see what you’re actually buying when you pay more — not just labour, but someone to own the columns you’d otherwise carry alone.

    Route 01 · the springboard

    Hiring an architect to build a house in Mexico

    An architect gives you a professional route — but it doesn’t automatically remove structural risk, and the budget pressure can land where you’d least want it.

    The appeal is obvious: pay more, hand it to a professional, get drawings and someone to run it. For a complex design, a difficult or hillside site, a tight timeline, or if you can’t be on site often, that’s often the right call. But an architect operating on competitive margins has to find savings somewhere when an unforeseen cost appears — and savings can come from places you don’t see, including the structural spec.

    What happened on my own plans — the armex story

    When my architect drew up the plans, he suggested one way to bring the budget down: use armex — a thin, factory-made electro-welded reinforcement — in some intermediate columns, instead of having the builders tie rebar cages, or castillos, by hand on site.

    I was told this was a recognised and reliable method, and at the time I did not really understand the difference. In the end, I used armex only in the intermediate columns of one external wall. What gave me second thoughts later was not whether armex is allowed, but how thin it looked and felt next to a hand-tied castillo.

    I am not saying armex is unsafe, or that every architect specifies it. But in an earthquake zone, knowing what I know now, I would ask very direct questions about what is going into the columns and beams. The structural spec is one of the few parts of the build you cannot easily revisit later.

    And a plan is not supervision. A drawing on paper doesn’t build itself or check itself. Someone still has to confirm that what’s going up matches the drawing — and that the details the drawing doesn’t show have been thought through at all. That gap between “designed” and “supervised” is exactly where the next two routes live.

    An architect is not always a structural engineer

    It’s easy to assume “architect” means “the person responsible for the structure.” Often it doesn’t. Depending on the project and location, an architect may design, draw, permit, supervise or coordinate — while the structural calculations and structural responsibility sit with a separate engineer, or with builder convention.

    For anything structural — foundations, slabs, beams, columns, retaining walls, hillside builds, extensions — ask plainly: who is responsible for the structural design, and has an engineer reviewed it?

    Best for: a complex or ambitious design, a difficult or sloped site, a tight timeline, handling permits and plans, or anyone who can’t be on site often enough to catch problems themselves.

    Route 02 · the high board

    Working with a maestro de obra in Mexico

    A maestro de obra is the natural middle option — and the one where the result rides most heavily on the individual.

    Many masons who have the temperament to lead others, and to step back from doing the work themselves, become maestros de obra: they run the day-to-day site and coordinate the crew without you employing an architect. In my experience they’ll make you feel like you’ve chosen exactly the right person — and then, once work starts, the attention to detail and the quality of their workers can be hit or miss. They bring their own masons and skilled people at the right moments, which is the real value, but you still have to keep an eye on the work and nip problems in the bud.

    How you pay changes their behaviour. Pay by the week and things advance slowly. Negotiate a price for the whole job and they’ll put more masons on it, often working longer hours with fewer breaks to finish. And if you ask them to change the design, or fix something that wasn’t as you’d discussed, expect to pay extra — it wasn’t in the deal.

    Vet the person, not the phone

    Don’t choose on the strength of nice photos on a phone. Ask to visit the actual houses, and get a reference from a previous client you can reach. Even that isn’t a guarantee — I once contracted a maestro with stunning photos and a good reference, and he still didn’t work out — but it filters out a lot.

    Red flags when hiring a maestro de obra

    • Asks for a large advance to start
    • Can’t show recent work, or only photos — no houses you can actually visit
    • Previous clients are vague or hard to contact
    • The quote doesn’t say what’s included
    • Refuses a weekly / pay-as-you-go structure
    • Gets evasive when you ask about materials or methods

    A good sign, by contrast: a maestro who offers options and ideas and is clearly thinking about the details of your project — not one who just answers “no hay problema” to everything.

    Pay as you go

    There’s no need to hand over more than about a month’s worth of the agreed price at a time. A small advance to start the work is normal practice — keep it to a small percentage of the total, not a big lump up front.

    Best for: a clear design, when you can visit the site regularly but not daily, and when you can vet the person properly.

    Route 03 · the cliff dive

    Building without an architect: self-managing with masons

    Self-managing saves the most and gives the most control — and hands you every detail nobody else will plan.

    You draw up plans, with an architect or on the back of a napkin, and then run the project yourself. The saving is real, but so is the load: if you’re short on time or unwilling to learn as you go, expect more grey hair than you started with. The crucial thing to understand is that nobody plans the details but you. Don’t expect anything beyond the bare shell to be thought through — masons address plumbing and lighting after the main structure, and routinely miss planning for the best result.

    On my own build, the masons left me with a single main wiring route up the second floor instead of two. There were no design considerations for kitchen lighting sitting the right distance off the wall, or for plumbing following basic best practice — the kind of misses that later show up as bad smells, or as everyone over four feet tall casting a shadow straight across the kitchen counter while they cook. One of my favourite memories, now that I can laugh at it, was the argument to move a half-built wall a few inches so the back of the toilet would actually align with the bathroom plumbing. Don’t expect masons to follow architectural plans unless you’ve gone over every detail with them — and then reminded them.

    The cross-cutting decision

    Pay weekly, or for the whole job?

    This sits underneath the maestro and self-manage routes, and it’s a management decision as much as a cost one. Neither is simply cheaper — they suit different amounts of your own time and attention.

     Weekly / day rateWhole-job fixed price
    SpeedSlower — a couple of years isn’t unusualFaster — built in months if scope is clear
    FlexibilityHigh — change the design as you go, “let’s add a window here”Low — changes cost extra and break the price
    Quality controlEasy to halt the work before it’s too lateBuilder may rush or hide compromises if the margin gets tight
    LearningA year of conversations and you’ll understand the whole buildLess hands-on involvement
    Bringing your own tradesBuilders paid by the day will wait for your plumber/electricianBuilders paid for the job won’t wait around for anyone
    The riskDrifts if you’re not actively managing itIncentive to finish — and to economise where you can’t see

    The honest trade-off: paying weekly buys flexibility, learning and control but rewards slow progress; a fixed whole-job price buys speed but won’t pause for the electrician or plumber you bring in yourself. I go into the numbers behind both in the cost to build a house in Mexico breakdown.

    Why oversight matters

    Some mistakes become invisible — someone has to catch them in time

    Whichever route you choose, this is the work you’re really paying for (or taking on): being there at the moments a mistake gets sealed in and can’t be fixed without tearing something out.

    • Rebar — before the concrete is poured
    • Plumbing runs and slope — before render and floors go on
    • Electrical routes — before the walls are rendered
    • Slope & drainage — before the floors are finished
    • Roof joins — before waterproofing

    If you self-manage, these are your inspection moments. If you hire a maestro or an architect, this is exactly the oversight you’re paying them to own — so make sure someone genuinely does. The detail of how to check them is in the self-manage guide.

    The honest part

    The stress nobody quotes you

    Ask anyone who’s been through it and most will tell you building was taxing. Living five miles from my site and working full time while managing it, I put over 6,000 miles on my bicycle in the first year alone. The stress has two real sources.

    The accountability gap. Everyone does their part, but nobody owns the whole house unless you pay someone to own it — or you own it yourself. When the standard falls short and you don’t have the knowledge or the time to spot it and fix it, that gap is where the stress lives.

    Imported expectations. Many “simple” expectations are really tacit agreements that hold in Europe or the US and may not here. If the lighting and the plumbing routes were never explicitly discussed — because you assumed the mason would raise them — those conversations simply don’t happen, and the misses follow.

    The mason-changeover ritual

    If you change masons during the build — and I did, many times — be ready for it: every new mason has a moment where he looks at the previous one’s work and disapproves of it. Some of that is real and worth hearing; some of it is theatre. As the owner, part of the job is learning which is which.

    One practical note that saves money and stress: if you’re not paying someone to manage the job, suspend work when the rainy season pushes persistent rain across the country. Workers will happily turn up and spend half the day sheltering — pleasant for them, expensive for you, and concrete still has to be mixed outside.

    Questions

    Common questions

    Do I need an architect to build a house in Mexico?

    No — most homes in Chiapas are built without one, either with a maestro de obra or by self-managing with masons directly. An architect makes most sense for a complex design, a difficult site, a tight timeline, or if you can’t be on site regularly. One caution: an architect isn’t automatically the person responsible for the structural design — ask who is.

    What is a maestro de obra?

    An experienced lead builder — usually a mason who’s stepped back from the physical work to run the day-to-day site and coordinate the crew, for a fee. It’s the middle route between hiring an architect and self-managing, and the quality depends heavily on the individual, so vetting matters.

    Is a maestro de obra cheaper than an architect?

    Usually. As a rough planning guide off my self-managed baseline, a maestro adds around 20% and an architect-led route around 25% — not fixed rules, and they move with the person, design and site. Self-managing is the cheapest because you absorb the management yourself, in time and attention.

    Can I build a house in Mexico without an architect?

    Yes — many people do. What you can’t safely skip is the structural and legal side: depending on your municipality and land status you may still need plans, permits or an engineer’s involvement. “No architect” is a choice about who runs the build, not a licence to skip what’s legally or structurally required.

    Is it cheaper to pay builders weekly or for the whole job?

    Weekly pay gives flexibility and time to learn, but rewards slow progress — a build can stretch to a couple of years. A fixed whole-job price is faster, but builders won’t wait for trades you bring in, and a tight margin can tempt them to economise where you can’t see. Neither is simply cheaper.

    What’s the safest structural choice in an earthquake zone?

    I’m not an engineer, so treat this as a homeowner’s experience, not advice. What I’d do now is ask direct questions about what’s going into the columns and beams — hand-tied castillos versus thinner factory-made armex, for example — and confirm a qualified engineer owns the structural design, especially on a slope or for an extension. A cheaper structural spec is one of the few things you can’t easily change later.

    Luke Burchell

    Written by Luke Burchell

    I built and managed my own house in San Cristóbal de las Casas, Chiapas — self-managing it with masons directly, after having plans drawn up by an architect and contracting maestros de obra along the way. This is what I learned about who should run a build, from self-managing, building from an architect’s plans, and working with maestros myself.

    Read my full story →

    Last updated · July 2026 · San Cristóbal de las Casas, Chiapas

    First-hand experience from one self-managed build, shared so you can choose how to run yours with realistic expectations. Specific to Chiapas — rules, costs and practice differ by region and year. Nothing here is professional building, structural, legal or engineering advice; confirm anything structural or safety-critical, and any permit requirement, with someone qualified for your own site.

  • Managing your own house build in Mexico: 10 things I wish I’d known

    First-hand · one self-managed build

    Managing your own house build in Mexico: 10 things I wish I’d known

    I managed the construction of my own house in San Cristóbal de las Casas, Chiapas — finding materials, coordinating masons, catching mistakes and making decisions, while working full time. This isn’t a generic construction guide. It’s the practical site knowledge I only picked up because I was the person who had to order the sand, check the cement, question the finish, and keep the job moving.

    PlaceSan Cristóbal, Chiapas
    BuildSelf-managed, in stages
    Useful forOwner-builders in Mexico
    Check locallyPrices & practice vary

    En español: Cómo gestionar la construcción de tu casa en México →

    From my build · the shell going up

    Two-storey concrete-block house shell under construction on a forested plot in San Cristóbal de las Casas, with a wooden site staircase up to the first floor and building materials in the yard
    The house partway through the build, 2019 — ground floor standing, first-storey blockwork rising, and the site staircase the masons knocked together from formwork timber. Every block, bag of cement and truckload of sand in this photo was something I ordered, checked and counted.

    The short version

    Managing your own build can save real money — but the saving isn’t free. You pay for it with attention. You become the person responsible for materials, timing, quality checks and daily decisions — the jobs a contractor or maestro de obra would otherwise carry for you. Self-managing doesn’t mean doing all the labour yourself. It means being close enough to the work to stop small problems becoming expensive ones. These are the ten lessons that cost me time and money to learn.

    First, the basics

    What does managing your own build actually mean?

    When I say I managed my own build, I don’t mean I laid every block or poured every losa myself. I hired masons and paid skilled workers for the things they knew how to do. The difference was that I didn’t hand the whole project to an architect, contractor or maestro de obra and wait for a finished house.

    I was the person ordering materials, checking what had run out, comparing prices, asking why something was being done a certain way, and deciding what could wait until later. That gave me more control over the budget — but it also meant the delays and mistakes were mine to catch.

    This article is about that middle ground: not doing everything yourself, but not disappearing from the build either.

    At a glance

    The ten lessons, and why each one matters

    Each lesson is a thing I got wrong, learned late, or only understood after I’d already paid for it. The deeper technical and cost detail lives on the linked pages.

    The ten lessons, at a glance

    LessonWhy it matters to you as the managerGo deeper
    1. Own your materials supplyBuilders’ prices for sand, gravel and cement can run 15% higher than your own contact — on the biggest-volume materials in the build.Cost breakdown
    2. Plan extensions before the concrete is pouredLeaving protruding rebar now is free; retrofitting later can mean weaker joins and damp problems.Roof choices
    3. Pin down the rendering standardIt quietly decides labour cost, material use and whether your walls are straight — and whether the render is still on in two years.
    4. Don’t let recycled nails slow the jobPaying labour to straighten old nails costs more than the nails.
    5. Store cement properly in the rainy seasonBulk cement ruined by damp is money poured away.
    6. Hand-poured slab vs mixer-and-craneRoughly the same price; very different on speed, mess and confidence.Roof choices
    7. Have plastic sheets ready before the pourA slab that dries too fast in the sun cracks — and you can’t go back.
    8. Learn the thermofusorA MX$400 tool lets you finish your own plumbing — the lowest-barrier building skill there is.Water system
    9. Render the exterior as part of the buildDoing it years later means cleaning cement off finished doors, windows and paths.Cost breakdown
    10. Choose wall materials for how they liveComfort you feel every morning and night — not just the price on the quote.Wall materials

    Lesson 01

    Own your materials supply — and count it every afternoon

    On my build, the supplier contact alone moved the price by around 15% on some of the highest-volume materials.

    Sand and gravel are bought by the camionada — the truckload. My first assigned builder asked whether I’d handle ordering them. I had no idea who to call, so we agreed he would. Two things became clear later. When I switched builders, I found the price for these materials could move by around 15% depending on whose contact you used — a substantial amount on some of the highest-volume materials in the whole build. And having my own supplier the second time around was quietly empowering: it shows a builder you know what you’re doing, which sets the right boss-and-contractor tone from day one. I’ve since had builders ask me for my contact when I tell them the price I pay.

    Smaller, non-chain ferreterías sometimes grow into sizeable local cement distributors, and in my experience they’re cheaper than the big chains — though they often take longer to deliver. Buy cement by the ton, and rebar in volume, and you save on both.

    The other half of this lesson is the one I’d repeat loudest: check your sand, gravel and cement on site at the end of every day. If you’re managing the build, the masons won’t be tracking stock for you — they’ll tell you they’ve run out only once they have, with the work already stopped and people standing around. Order at least a day ahead; order in the early afternoon for the best chance of delivery before midday the next day. When the columns and beams are going up, the same applies to alambrón, alambre and nails.

    Why this is lesson one

    Running out of material is the most common way a self-managed build loses days — and idle workers you’re paying by the week. The fix costs nothing but a five-minute walk-round each afternoon and one phone call.

    See what these materials actually cost →

    Lesson 02

    Plan future extensions before the concrete is poured

    The cheapest time to plan an extension is before the first roof is even poured — and it’s free.

    I built my house in two stages, so I’ve had to add onto existing concrete. Two things are worth knowing before you’re in that position. First, if you tie a new horizontal reinforced-concrete beam into an existing column, it’s a weak connection. Some masons refuse to do it; others do it without a second thought. Don’t take either at face value — ask a structural engineer.

    Second, if you already know you’ll extend a concrete roof later, ask the masons to leave a good length of rebar protruding from the reinforced beam, perpendicular and ready, so the new roof can be structurally joined. It costs nothing now and is almost impossible to replicate later.

    The caveat I learned the hard way

    In my experience, joining a new concrete slab roof to an existing one tends to let water and humidity filter through the join, however carefully it’s done. I’m running tiles over the full length of where my two roofs meet to keep the damp out of the house. Plan for the join to be a weak point, and detail it accordingly.

    If you’re weighing a concrete roof against the alternative for exactly these reasons, I wrote up the full comparison separately.

    Lesson 03

    Pin down the rendering standard before you accept the quote

    “Rendered” can mean two very different walls — and the cheaper one isn’t straight.

    I had two clearly different standards of rendering on my house from different builders. In the first, the render is brought plumb and a builder’s line is used meticulously, so the finished wall is genuinely straight and level across its whole length. In the second, no consistent flat surface is achieved across the wall. The second is faster, easier and uses less material — especially where the wall isn’t plumb, because the builder isn’t compensating with extra cement. Both get called “rendering.” Always ask which one you’re quoting, or which one you’re getting — it has a big effect on labour and on how the finished house looks.

    There’s a second conversation to force, and it’s about adhesion. Render doesn’t stick well to smooth concrete, and columns and beams are usually smooth. In Guatemala, masons routinely chisel small indents into those surfaces so the render grips. In Chiapas, in my experience, this gets skipped or done half-heartedly. Make it an explicit talking point: “How are you making sure the render doesn’t fall off in a year or two?”

    Lesson 04

    Don’t let recycled nails slow the job down

    Recycling is good — except for nails on an active site.

    I’m all for recycling, and I’d never argue against it generally. But every mason I’ve hired will stop and hammer old nails out of scrap wood and straighten them for the next stage rather than ask for new ones. That’s labour I’m paying for, to save the cost of nails that are cheap to begin with. Buy the nails. The old ones can still be recycled after the project — when they’re not holding up your build.

    Lesson 05

    Store cement properly in the rainy season

    Bulk cement is a saving — until the damp gets into it.

    If you’ve bought cement in bulk to save money, protect it, especially in the rainy season. Keep it off the ground, keep it under a roof, and wrap it in plastic — particularly if it might be a couple of weeks before you use it all. Damp cement is money you’ve already poured away. (This is one of several reasons to have plastic sheeting on site before you need it — see lesson 7.)

    Lesson 06

    Hand-poured slab vs mixer-and-crane: why I switched

    Most roofs in Chiapas are poured by hand — the slab, or losa as it’s called on site. I had my intermediate floor poured by workers carrying buckets. When I added rooms onto the back of the house later, I paid for a concrete mixer truck with a pump on an extendable crane instead. Here’s why.

    I expected price to be the deciding factor — it wasn’t. I costed both options and they came within 6% of each other (and even that’s fuzzy, because a manual pour can leave you with leftover concrete mix). On cost, call it a wash. The real differences were everywhere else:

    Hand-poured slab vs mixer & crane

    FactorWinnerWhat I saw
    SpeedMixer & craneAbout 45 minutes, versus roughly 3 hours by hand (depends on roof size).
    Mess & labourMixer & craneA hand pour means 15–20 labourers tramping round the wet site — whom you then feed — and a clean-up the next day.
    Platform strengthHand pourThe crane drops cement from a height, so your timber shuttering has to be built stronger for it.
    Mix confidenceMixer & craneBy hand, with many people mixing, proportions vary and mud gets walked into the mix in the wet season. I trusted the mixer more.

    An honest disclaimer

    Which of my slabs cracked? The one poured by the mixer. But I doubt the mix was to blame — far more likely a movement in the supporting structure and the intense sun straight after the pour (see lesson 7). I still chose the mixer the second time, and would again.

    Lesson 07

    Have plastic sheets ready before you pour

    A slab cures by staying wet. In direct sun, it can’t — unless you’ve planned for it.

    If you pour a losa — the concrete slab, and you may end up doing parts of it yourself — cover it, especially if the roof or floor sits in direct sun all day. One thing they do in Guatemala that I’ve not seen in Mexico is build a temporary cement lip around the roof edge at the pour, to pond water on top and keep the slab humid while it cures. My roof was fully exposed, and despite trying to keep it wet, that’s nearly impossible without something to trap the water. A plastic sheet both shades the slab from the worst of the sun and helps hold the moisture in. I wish I’d done it.

    When you’re not curing a slab, those same sheets earn their keep: strapping over your stored cement bags (lesson 5), and protecting anything you don’t want cement on — brick, stonework, finished pavers — while rendering.

    Lesson 08

    Learn one simple skill: the thermofusor

    For about MX$400, you can do your own plumbing joins. There’s no lower-barrier building skill.

    You can buy a Chinese thermofusor on Amazon — like I did — for around MX$400, and it works perfectly. There is no cheaper, lower-training-barrier house-building and maintenance skill than fusing together ½” water pipe. YouTube covers the few basic steps, you can practise for almost nothing, and at a minimum it lets you finish off the bathroom and kitchen connections yourself when you’re fitting the sinks and toilets.

    Lesson 09

    Render the exterior as part of the build, not years later

    Rendering is a filthy job. Do it before there’s anything finished to ruin.

    I had the outside of my house rendered two years after the build was otherwise done, because I didn’t have the budget for it at the time. I don’t regret waiting — but it’s not a good experience. Render is messy work, with wet cement flying everywhere; even the cat keeps away while the builders are at it. Doing it late meant cleaning cement off finished doors and windows, and fretting over footprints and splatter on the new garden-path pavers. If you can possibly afford to render the exterior while the build is still rough, do — your doors, windows, paths and driveway will all thank you for it.

    Lesson 10

    Choose wall materials for how they live, not just what they cost

    Wall materials are not just a price decision. On my build, I used different materials in different parts of the same house — brick, hollow cement block, tabicón and a lightweight pómez thermal block — and they did not feel the same once I was living with them.

    The biggest lesson was that a wall’s sun exposure matters as much as the unit price. A material that makes sense on a sunny wall may not be the right choice for a shaded bedroom wall that stays cold all winter. I wish I had planned the wall materials room by room before the build reached that stage.

    For the full comparison — cost, comfort, render choice, weight and where I’d use each material again — see brick vs block vs thermal block in Mexico.

    Keep this

    The end-of-day site checklist

    The single habit that prevented the most lost days. Walk the site each afternoon and check you have enough of these for tomorrow — and order by early afternoon if you don’t.

    • Sand & gravel — by the truckload; your own contact, not the builder’s
    • Cement — and that it’s stored off the ground, under cover, wrapped
    • Rebar — and, while pouring columns/beams, alambrón and alambre
    • Lime — for render mixes
    • Nails — buy them; don’t pay labour to straighten old ones
    • Plastic sheeting — for curing a fresh pour, covering cement, masking off finishes

    The masons won’t track any of this for you. They’ll flag a shortage only once they’ve run out — by which point the work has already stopped.

    Know the limits

    When I’d still bring in a professional

    Self-managing is about controlling materials, money and momentum — not about overruling people who know more than you. There are decisions I wouldn’t make on my own judgement.

    Anything structural or safety-critical is worth paying for advice on, even on a tight, self-managed build:

    • Foundations and footings — especially on a slope or poor ground
    • Roof and floor slabs, and any join between old and new concrete (lesson 2)
    • Structural extensions — get a structural engineer’s view before tying in
    • Drainage — getting water away from the building correctly
    • Legal and land status — deeds, ejido land and the SRE process for foreigners

    Managing the build yourself saved me real money, but it works because I knew where my judgement ran out. The point isn’t to do everything — it’s to be the person who decides, sources and checks, and to buy in expertise exactly where the risk is highest.

    Questions

    Common questions

    Is it cheaper to manage your own house build in Mexico?

    Yes — in my case, self-managing came out well below the MX$8,000–22,000/m² that many construction firms quote, because you’re not paying for their management and margin. But the saving isn’t free: it’s paid for with your time and attention. You become responsible for sourcing materials, checking quantities daily, deciding the finish standard and keeping people working. If you can’t be on site regularly, much of the saving disappears.

    Should I hire a maestro de obra or manage the build myself?

    A maestro de obra is an experienced lead builder who runs the day-to-day site and coordinates the masons for a fee — less than an architect, more than going it alone. Managing it yourself saves that fee but means you own the materials, timing and quality control. It comes down to how much of your own time you can give the site. If you can be there most days, self-managing is realistic; if you can’t, a maestro keeps the job moving without you.

    What materials do I need to check on site every day?

    Sand, gravel, cement, rebar and lime — and while you’re pouring reinforced columns and beams, also alambrón, alambre and nails. Walk the site each afternoon and order anything short by early afternoon, so it has the best chance of arriving before midday the next day. The masons won’t monitor stock for you; they’ll tell you once they’ve already run out.

    What’s the biggest mistake when managing your own build?

    Running out of materials. It’s the most common way a self-managed build loses days, and it leaves workers you’re paying standing idle. The fix is almost free — a daily stock check and ordering a day ahead. After that, the costliest avoidable mistakes are accepting a vague rendering standard, and not curing a fresh concrete slab properly in the sun.

    Can I build a house in stages and extend it later in Mexico?

    Yes — I built mine in two stages, and many homes here are built room by room as money allows. The key is to plan for it before the concrete goes in: ask the masons to leave rebar protruding from the beams where a future roof will join. Be aware that a join between old and new concrete tends to let water through, so detail it carefully (I run tiles over mine), and get a structural engineer’s view before tying new beams into existing columns.

    Luke Burchell

    Written by Luke Burchell

    I managed the construction of my own house in San Cristóbal de las Casas, Chiapas — coordinating the masons, the materials, the water system and the finishing work myself, while living locally and working full time. These are the lessons I actually learned doing it, shared so you can skip the ones that cost me time and money.

    Read my full story →

    Last updated · July 2026 · San Cristóbal de las Casas, Chiapas

    First-hand lessons from one self-managed build, shared so you can plan yours with real experience instead of guesswork. Specific to Chiapas — practices, prices and the best choices differ by region and year. Nothing here is professional building, structural or legal advice; confirm anything structural or safety-critical with someone qualified for your own site.

  • The stove I built to leak heat

    The stove I built to leak heat

    Field notes · outside the usual routes

    The stove I built to leak heat

    Every organisation building cookstoves in the Guatemalan highlands seemed to be chasing the same thing: efficiency. The less firewood a stove burned, the better the design was meant to be. I understood the logic — families spent too much time and money gathering wood, and the smoke from open fires was bad for their health, so a tighter, more efficient stove genuinely helped with both.

    But in the cold villages of the Cuchumatanes I kept noticing what the efficiency argument left out. A stove there isn’t only for cooking. It’s where the whole family gathers each evening — eating, sharing atol, talking through the day until bedtime — and in a single-room house it’s the only warmth there is. I knew those hours first-hand, from years of living alongside families in Todos Santos and other Guatemalan villages.

    So I built a stove that leaks some heat on purpose. The goal was never warmth instead of efficiency — the stove still had to move heat into the cooking surface better, and burn less wood, than the stoves it replaced. It was a balance: improve the cooking, but don’t design away the warmth those evenings depended on.

    What efficiency alone missed

    I’m not an engineer. What I had instead were years of eating in highland kitchens, sitting beside fires at night, and sleeping in single-room homes where the cooking fire was also the only heat in the house.

    Cookstoves had become a serious subject in Guatemala around then. Carbon credits and clean-cooking money had brought real attention into the sector — I went to a conference in Antigua, funded as I remember it by the Gates Foundation — and organisations were setting up workshops in the touristy towns, Xela and Antigua. I visited some of them. The stoves were well made and genuinely efficient, and I admired them. But I kept seeing the same two gaps.

    The first was the firewood intake, usually built small, for thin sticks. The families I knew didn’t cut their wood that way — they burned larger pieces, because splitting wood small with an axe costs time and energy nobody has spare. The second was warmth. A stove that captures every last bit of heat and sends the smoke cleanly up the flue makes sense on a test sheet. In a cold mountain house it can be the wrong kind of efficient: it cooks the food and leaves the room cold.

    An open cooking fire burning on a tiled concrete stove base in a highland kitchen, surrounded by aluminium pots and tortillas on a comal
    A typical concrete stove of the kind we were replacing — not far from an open fire with a cooking surface around it. The wood burns fast and the smoke goes where it wants.

    Designing for the room

    So I designed around the life I’d actually seen. The stove needed an intake big enough for real pieces of firewood, not just sticks. It needed a cooking surface big enough for a family. It needed to give some heat back to the room, because in the colder villages that warmth was part of the day. And it needed a small shelf, because when people gathered around the fire at night with their atol, the cups and plates needed somewhere to go.

    None of that came from engineering. It came from having been in the room. The mistake outsiders make is to treat the stove as a device. In those houses it was part of how the home worked.

    The engineers were designing the heat out. I was designing it back in.

    The problem that kept me awake

    The hardest question wasn’t how to make a stove burn wood well. It was how to make a large, heavy cookstove portable.

    Most projects solved that one of two ways, and I didn’t like either. You could make the stove small — easier to carry, sell and install, but not what I’d want if I were cooking in a highland house every day. Or you could build it in place from cement and blocks, which works but needs masons, materials and time, and turns a family’s home into a building site. I wanted something a family could actually buy, carry and assemble: large enough to be useful, heavy enough to hold heat, and still movable enough to reach a house with no road to it. For months that problem woke me up at night.

    Brick, heat and weight

    The answer I kept returning to was brick. Brick has good thermal mass — it soaks up heat while you cook and releases it slowly afterwards — exactly what a cold house needs. It’s also far lighter than a solid cement-and-block stove.

    I already knew the man who owned a local brick kiln, so large paver-style bricks could be made cheaply. The idea was a metal frame with a free-standing internal brick structure inside it, thermally isolated with pómez, the volcanic stone Guatemalans build with. It wasn’t an obvious design — a free-standing internal combustion structure sounds like something that should collapse — and working out how to keep it stable took months and several prototypes. But if it held, the stove could travel in pieces: frame, bricks, pómez, cooking surface. Still heavy, but movable. In the mountains, movable was everything.

    Kneeling beside a metal-framed brick cookstove prototype, testing it in a paved patio
    Testing an early prototype in my patio — the metal frame around a free-standing internal brick structure, before the design ever went up into the mountains.

    Don Fredy’s workshop

    The first real versions took shape in Nebaj. Don Fredy had a welding workshop at his house, and for months he let me in almost every evening. I’d arrive with a new idea or a problem from the last prototype, and we’d stand there working out what to change — the frame, the intake, the combustion chamber, how the bricks sat inside, how the heat moved. I was taking an evening course in welding cars at the same time, which gave me just enough understanding to ask better questions about metal and heat.

    We built several prototypes. One lived in my own house, where I could cook on it, dislike parts of it, change them and test again. I made smaller rocket stoves for corn and tortillas in that period too, but the big family stove was the one that took over my mind; I kept waking up with the next change I wanted to try.

    None of the wider project would have happened without Greg Van Kirk, co-founder of Social Entrepreneur Corps and Soluciones Comunitarias — the local social business that could turn a good stove into actual jobs by distributing it. He backed it more than I can easily put into words.

    When local engineers chose it

    In 2013, engineers from ACODIHUE — a regional development association working with smallholder farmers across Huehuetenango — chose the model I’d been developing with the local fabricators, after testing a range of cookstoves. As far as I knew, I was the only person designing for that kind of adoption who wasn’t an engineer; what I had instead were the years in the kitchens.

    What I respected most was who was choosing. ACODIHUE’s engineers come from San Francisco Las Flores, a village deep in the Cuchumatanes — local engineers deciding from inside the region, not outsiders guessing from a distance. And the families weren’t being given the stoves; they were putting their own savings into them. That raised the bar. The stove didn’t just have to be clever. A family had to want it enough to pay for it.

    Leaky, but tested

    “Leaks heat” makes it sound casual, so let me be precise. The stove was tested the way the sector tested everything: boiling measured amounts of water, weighing the firewood before and after, comparing fuel consumption run after run. Against the concrete stoves families in Guatemala typically built when they had the income for one, it came out — as I remember the results — substantially more efficient: measurably less wood for the same cooking. The warmth it gave the room was on top of that, not instead of it.

    That arithmetic carried the economics too. Families paid for their stoves in monthly instalments they’d agreed to, and as I remember it, the firewood a family saved each month lined up with the payment. Owning the stove wasn’t a hardship; in effect, it paid for itself as it went.

    Workers loading red sacks of pómez and stacked bricks onto a brightly painted truck outside a workshop wall in Huehuetenango
    Shipping day — the first 89 stoves leaving for five communities deep in the Cuchumatanes, travelling the only way the design allowed: as frames, bricks and sacks of pómez.

    The night in Chichim

    Juan, a young man I’d trained — seventeen, wiry, a big grin under his baseball cap, and already married with a full-time job — and I were taken up into the mountains to install them, to high villages like Chichim, one of the highest I know of in Guatemala. We worked from first light to dark and slept in whichever house we’d reached by nightfall.

    The stove drop · Chichim

    A truck parked on a gravel mountain road at the top of the Cuchumatanes with red stove frames unloaded on the verge
    The drop at the top of the Cuchumatanes, just outside Chichim — as far as the truck could go.
    Villagers in traditional dress standing around a red stove frame, bricks and cooking plates on rocky ground in Chichim
    Chichim — frames, bricks and cooking plates arriving in pieces, ready to assemble house by house.

    That’s how I ended up in a single-room house, sharing a bed with Juan while the family slept a few metres away — two adults and two children in the other bed, the room serving as kitchen, living room and bedroom at once. It was bitterly cold. We had three heavy blankets over us, the kind that press on your chest until breathing takes effort, and even in all my clothes I couldn’t get warm. Twice in the night I went outside to urinate in the dark. The third time I got up it was around five in the morning and the stars were still out — but I wasn’t the only one under them. The village was already awake, the men gathering for the microbus down to town. Transport from a place like that might leave once a day, very early; miss it and you don’t simply catch the next one.

    That morning explained the stove better than any drawing could have. The fire, the cold, the one daily bus, the single room — they were all the same problem, and the stove had to fit inside it.

    Interior of a single-room highland home in the Cuchumatanes — an open cooking fire with pots, corn drying in the roof-space, earth floor
    A single-room highland home in the Cuchumatanes — the cooking fire is also the only heat in the house, corn drying in the roof-space above. This is the room the stove had to fit inside.

    Moving stoves by mule

    In San Francisco Las Flores some houses had no road to them, so the villagers helped us carry the stove parts by mule. I remember the mule trotting ahead loaded with bricks, pómez and the metal skeleton of a stove — the moment all those months spent on portability paid for themselves. The stove was still heavy. But it moved, and because it moved it could reach homes a fixed cement stove never would.

    A red metal stove frame being loaded onto a pack animal's saddle on a wet village track in the Cuchumatanes
    Loading the stove frame for the last stretch in San Francisco Las Flores — no road reaches every house.

    I was told the snap peas grown on those slopes were destined for the UK. There was something quietly strange in the exchange: a British man arriving in the mountains with wood-burning stoves while the local peas travelled back across the Atlantic to Britain.

    One morning we set off at five for a village spread across the side of a valley so steep and undeveloped it appeared to be nothing but mountains and waterfalls; ACODIHUE got us in by small off-road vehicle. The houses weren’t grouped along a lane the way they are in some places near the Mexican border around Las Huistas — they were scattered almost invisibly across the mountainside, some separated by deep gorges and tough thirty-minute treks. Even after years living and working in the region it was one of the most beautiful places I’d seen, and one of the poorest. The people met us with the same patience and broad smiles I found everywhere in Guatemala, even where we couldn’t share a word — the older generations spoke only Q’anjob’al, one of Huehuetenango’s nine indigenous languages, and we had no translator.

    Installing the stoves · Cuchumatanes highlands

    Installing the finished stoves in highland homes — the last-mile work the whole design was for.

    After the prototypes

    After about a year of designing, testing and selling the first stoves, manufacturing was set up in Nebaj by Soluciones Comunitarias. The programme grew through their network of women entrepreneurs, who were already carrying practical things into rural communities — eye exams, water-filtration buckets — across the western highlands.

    A crowd gathered around a demonstration stand in Nebaj's central park, with an improved cookstove and water-filtration buckets on display
    Exhibiting the stove in Nebaj’s central park after manufacturing moved there — on the stand beside it, the water-filtration buckets the women entrepreneurs already carried into rural communities.

    That mattered to me, because the stove was never only the object. The point was whether something could be made, moved, installed and explained locally, by people who understood the communities it was going into. A stove that depends forever on the foreigner who designed it isn’t a good stove. It always had to leave my hands. And it did: the stove went on under the name La Estrella, and in 2014 MIT D-Lab field-tested it in Guatemala with the SolCom team — an independent record of a stove that no longer needed me.

    What the stove taught me

    I think of that stove whenever someone talks about optimisation as if it were the same thing as wisdom. The engineered stoves were better than mine by some measures — they burned more cleanly and efficiently, and would have looked better than mine on most test sheets. But mine was shaped by different questions. What firewood do people actually use? How cold is the house at night? Where do they put their cups? Can it reach a home without a road? Will a family want it in the room where they cook, eat and sleep?

    Those questions changed the design. The stove leaked heat because warmth was useful. It took big firewood because that’s what people burned. It held heat because the room needed to stay warm after cooking. It came apart because the road didn’t always reach the door. Good design didn’t start with the cleverest solution; it started with paying enough attention to understand the real problem.

    It worked because I’d been cold in the houses it was built for.

    Why this one’s here

    This wasn’t a house-building project, it wasn’t in Mexico, and it happened years before I built my own home in Chiapas. I still drive up into those highlands a few times a year, across the border at La Mesilla. But it’s where I learned the thing the rest of this site runs on. You can take a great deal from experts, plans and diagrams, and sometimes you need them. Yet if you haven’t sat in the room, watched the firewood being cut, followed the road until it ended and slept under the same blankets as the people you’re designing for, you’re still missing part of the truth. That’s what Alternative Lives is for — not to romanticise hard places, but to show what becomes visible when you stay long enough for the details to change your mind.

    This is a personal account, written from memory a decade on. Dates, names and numbers are as I recall them — the figures here are recollections, not records I kept at the time. Where it matters, I’ve said so rather than round a memory up into a fact.

    — Luke Burchell

    Field notes · Alternative Lives · written in San Cristóbal de las Casas, Chiapas

  • Water was the part of my Mexico house build I should have planned first

    Building in Mexico · what I learned

    Water was the part of my Mexico house build I should have planned first

    I treated water as something I’d sort out once the house was standing. That was the mistake — by the time I was thinking seriously about cisterns, roof tanks and pipe routes, the walls were going up and some of my choices had already been made for me.

    PlaceSan Cristóbal, Chiapas
    BuildSelf-managed
    SystemCistern + gravity feed
    House system≈ MX$74,000
    Paid — what I actually paid ~ Estimated — worth checking locally

    Why it matters

    Water isn’t a finishing detail here. It decides whether the land you bought was actually cheap, whether your roof is any use for catching rain, how much storage you need before the rest of the house works, and where every pipe has to sit before the render closes the walls. If I built again, water is one of the first systems I’d plan, not one of the last.

    The basis

    This guide to the water system for a house in Mexico is based on one self-managed build in San Cristóbal de las Casas, Chiapas — my figures, my mistakes, and the parts I taught myself. It isn’t a professional plumbing design, a legal guide or a well-drilling manual.

    My water system at a glance

    Cistern pump 1,100 L Rotoplas roof tank gravity feed kitchen / 2 bathrooms / boiler

    10,000 L cistern 1,100 L roof tank gravity-fed ≈ MX$74,000 house system deep well not included

    That last point matters, because the two big numbers on this page are close enough to confuse. The ≈MX$74,000 is the system inside the house — cistern, pump, roof tank, pipes, fittings, boiler connections and wastewater. Getting water out of the ground in the first place, if your land has none, was a separate ~MX$80,000 quote. Don’t let them blur together.

    Plan water first

    Water wasn’t a finishing detail

    Most masons here build the shell first and think about plumbing and lighting later — if you let them. That isn’t laziness; it’s just how the work is sequenced. The trouble is that if you’re waiting for the mason to raise pipe routing, drainage, bathroom layout or boiler placement with you, the conversation often doesn’t happen until it’s too late to do it well.

    Self-managing means getting ahead of it. The shell goes up fast — foundations, columns, cadenas, blockwork, roof, render — but the things that make a house comfortable are hidden inside that shell. Pipe runs, waste falls, shower and toilet positions, the kitchen route, the roof-tank feed: all of it has to be thought through before it disappears into a wall or a floor.

    That’s the part I underestimated. I was treating water as a later installation. In reality it had already shaped the land, the roof, the cistern, the plumbing layout, the drainage and the budget. The cost breakdown on this site gives water one line — this page is the story behind that line.

    Well or rain

    If your land has no water — well, rainwater, or both

    My land came with no water connection at all. That’s common on the rustic plots foreigners are drawn to, and it’s exactly the kind of thing that makes “cheap” land less cheap than it looks. With no connection, you have two real sources: catch rain, or get water out of the ground — and sometimes both.

    A well sounds simple until you know your water table. Mine sits about 18 metres down, which rules out the cheaper hand-dug, masonry-lined well — at that depth you’re into a pozo profundo, a deep drilled well. A local company quoted me around MX$80,000 to drill the bore (these are narrow, about 20 cm wide), drop in a pump, and connect it to the house. The quote assumed a standard depth of around 25 metres; the idea is to drill several metres past the water table to improve the chance of supply through the dry season, and if they have to go deeper there’s an added cost per metre.

    The legal side matters too. My understanding as a foreign resident was that I needed to confirm permission before drilling a deep well — but water is regulated and the details are technical, so treat that as a flag to check with a lawyer or the relevant authority for your own situation, not as settled fact. In Mexico, groundwater is regulated federally through CONAGUA — that’s the official starting point, not this page.

    Rain was the other half of my answer, and the roof you build decides how useful it is. Water off my lámina (tin) roof is much cleaner than runoff from the concrete roof, so the metal roof feeds the cistern that supplies the house while concrete-roof water goes to a separate tank for washing clothes. That’s my setup, not a universal rule, and it’s one reason the roof decision and the water decision are tied together — I get into why in tin roof vs concrete roof in Mexico. The full catchment build — gutters, filtering, overflow, dry-season storage — is a project in its own right, and I’ve kept it for the off-grid water guide so this page stays about getting water into and through the house.

    Storage

    The cistern: the part I couldn’t easily change later

    Almost everything else in this system can be adjusted, repaired or swapped later. The cistern can’t — it’s poured concrete in the ground, and you live with the size you chose.

    Mine is a concrete-lined cisterna holding about 10,000 litres, and it cost MX$30,000 (roughly MX$20,000 labour and MX$10,000 materials). It works. But if I were pouring it again I’d go bigger — 12,000 to 15,000 litres — because storage is the thing that carries you through the dry months, and once it’s in the ground you don’t get a second chance without breaking concrete.

    To size yours, it helps to know what you actually use. My family of four gets through somewhere between about 1,000 litres a week when we’re frugal — two quick showers each, reduced-flush toilets, before any laundry — and nearer 2,000 once we’re regularly washing clothes, which is by far the most water-intensive job. My toilets have the smallest tank I could find, cut down further with a 600 ml bottle so each flush is about 3.1 litres; washing dishes, for what it’s worth, can use as much as a shower. None of that is a rule for your household — it’s just the arithmetic behind why 10,000 litres has been enough for us, and why I’d still pour bigger if I could.

    Pump & gravity

    Pump to roof tank, then gravity feed

    The system itself is simple, which is the point. A pump lifts water from the cistern up to a 1,100-litre Rotoplas tank on the roof, and from there it feeds the kitchen, both bathrooms and the boiler by gravity. No pressure pump running every time you open a tap, nothing complicated to fail — just water falling downhill the way it wants to.

    The pump matters more than it looks. Mine cost around MX$3,000, but there are two types and the right one depends on the lift between your cistern and your roof tank — the height the water has to climb — so don’t just buy the cheapest box on the shelf. The Rotoplas tank itself was MX$3,800, the pipework and labour to connect the pump up to it came to MX$10,000, and the run from the roof tank down to the kitchen, two bathrooms and boiler was MX$12,000. The Rotoplas comes with an inline filter that gives the water a pass on its way up, which helps if you’re feeding it from rainwater — though it isn’t a full drinking-water filter, just one link in the chain.

    And that’s the useful way to picture the whole thing — as one chain: source → storage → pump → roof tank → fixtures → wastewater. A weak point anywhere along it shows up in the finished house.

    Plumbing layout

    Plan the plumbing before the walls close up

    This is where self-managing earns its keep, because once the render goes on, your pipe routes are decided forever. Fixture positions, supply lines, waste lines, boiler placement, access for future repairs — all of it has to be walked through before the walls are finished, and if you don’t drive that conversation it won’t happen. Get it wrong and you live with the consequences: bad smells from a poorly fallen waste pipe, or the daily annoyances that come from nobody having thought a room through.

    One of my better-remembered arguments on the whole build was over moving a half-built wall a few inches — it was maybe three feet tall and rising fast — because as it stood, the back of the toilet wouldn’t align with the bathroom wall and its plumbing. We moved it. Precious memories.

    How much of this you chase yourself depends on how you run the build — architect, maestro de obra, or doing it all yourself. But the lesson is the same either way: walk the water and waste routes before they’re hidden.

    From my build · bathroom pipework

    Bathroom pipework before rendering: green TuboPlus and cream CPVC supply lines running up an unrendered wall, with a white PVC waste trap at floor level
    One of my bathrooms with the wall still open. The green pipe is TuboPlus, the cream is CPVC, and the white trap at the bottom is the waste line. At this stage everything can still be moved — once the render goes on, it can’t.

    First-hand · a small thing that looked harder than it was

    Fitting a toilet

    I’d always assumed a toilet involved some elaborate installation. It doesn’t. I bought mine with no plumber on site, read the manual, and found the basic job is two holes drilled in the floor and a flange that seals the pan to the drain. Flanges run from about MX$40 to MX$600; the cheap wax one gives a good airtight seal if your floor is level, and I never saw a reason to buy the pricier plastic kind. A bead of silicone around the base finishes it — I used Sika sealant, easy to find on Amazon Mexico. Some of this work looks more intimidating than it is.

    CPVC vs TuboPlus

    CPVC vs TuboPlus: where each one made sense in my house

    For the supply pipes carrying water to your bathrooms and kitchen, you’re choosing between two materials, and the obvious instinct — buy the tougher one everywhere — is the one I’d argue against.

    CPVC is cut with a saw and joined with a yellow glue. It’s what masons reach for when they install the plumbing themselves: cheap, and genuinely easy to work with. TuboPlus is the plumber’s choice — heat-fused at every joint, tougher and flexible, with UV resistance CPVC doesn’t have. It also needs a fusion tool that’s bulky at the business end and awkward in tight spaces, and it costs noticeably more.

    CPVC vs TuboPlus — where each earns its place

     CPVCTuboPlus
    Per wet room~MX$150 — in-room runs~MX$600 — in-room runs
    Connections up to the roof~MX$700~MX$2,500
    How it joinsCut and glueHeat-fused
    StrengthsCheap, simple, easy to repairTough, flexible, UV-resistant
    WeaknessesLess robust; relies on the glue jointDearer; needs a fusion tool; awkward in tight spots
    Where I’d use itInside walls and floorsRoof runs and exposed/UV-exposed pipe

    I have both in my house, and here’s the verdict the price tag hides. On the roof and any exposed run I’d use TuboPlus without hesitation — the UV resistance alone settles it, and that’s where pipe failure is a real nuisance. But inside the walls I’m relaxed about CPVC, and not because I’m cutting corners. In my experience the wall runs are the lowest-worry part of the system, and on the day a joint does need opening up, I’d far rather be chasing out a cheap glued joint I can cut and re-stick than a fused TuboPlus run. The cheaper pipe is the more repairable pipe, and inside a wall repairability is worth more than toughness. You’ll see CPVC up on roofs sometimes — usually where a mason handled the plumbing rather than a dedicated plumber — and that’s exactly where I wouldn’t accept it.

    Drainage

    Wastewater and drainage: the angle matters

    Water coming into the house is only half the problem. Water also has to leave properly.

    I watched the masons on the plot next door install a rainwater drainpipe, then watched the water sit in it during the next downpour instead of running away. That was the moment I understood that the fall on a pipe isn’t something you can take for granted here — calculating gradient isn’t a universal habit on a building site. Waste pipes get laid “downhill,” yes, but often at whatever slope happens. So I went back and checked my own runs while they were still uncovered and I could get at them, and I taught myself to cut and glue PVC to fix the ones that were wrong.

    From my build · waste runs before the slab

    White PVC waste pipes zigzagging across the open foundations of the house, running out through the perimeter beams before the floor was laid
    My waste runs while they were still uncovered. The zigzag looks complicated, but every joint is either a 45 or a 90 — the whole thing is a hacksaw and glue. This is the stage to check the fall, because the floor goes down on top of all of it.

    The fall I was working to was about 2% — that’s the figure I used and it served me well, but treat it as the working rule I went by, not plumbing code for your site. The wider lesson is the one that matters: check the fall on your drainage before anyone covers those pipes. Afterwards is too late. (The wastewater filtration system I built is a separate project, and it’s in the off-grid water guide rather than here.)

    Costs

    What my plumber installed, and what it cost

    These are the cost items I used for the water and plumbing side of my own build budget — a mix of paid figures and practical estimates from my two-bed, two-bath house in Chiapas, in pesos. Treat them as a structure to adapt rather than a quote: plumbers bundle labour and materials differently, and wastewater in particular swings a lot with your house’s layout. Everything here is the system inside the house — the deep well is separate.

    Cost breakdown — the house water system

    ItemCost
    Cistern, ~10,000 L concrete-linedMX$30,000
    PumpTwo types; size it to the cistern-to-roof lift~MX$3,000~
    Pump → roof tankMaterials & labourMX$10,000
    Roof tank → kitchen, 2 baths & boilerMaterials & labour (TuboPlus)MX$12,000
    In-room supply pipework2 baths + kitchen (TuboPlus)~MX$1,800~
    Wastewater plumbing, whole houseVery design-dependent~MX$6,000~
    Rooftop tank, 1,100 L RotoplasMX$3,800
    Boiler / water heaterRange MX$1,500–25,000~MX$5,000~
    Boiler connections + 2 shower valvesMX$2,089
    Water & plumbing system≈ MX$74,000

    A note on the pipe lines: the roof-tank run assumes TuboPlus, since it’s exposed. Swap the in-room runs to CPVC and you’d save most of that MX$1,800; do the same on the roof connections and the gap is wider still — MX$700 against MX$2,500 — which is the cost side of the choice above.

    And again, this does not include the deep well — that quote was around MX$80,000 on its own. Which is the real reason to price water as a system, not a string of parts: the cistern, pump, tank, pipes, valves, boiler, waste lines and labour all arrive close together near the end if you haven’t planned them earlier.

    Doing it myself

    The plumbing I taught myself

    Fusing TuboPlus was the one job I assumed I’d never attempt — the heating tool looked like specialist territory. Then I was installing my kitchen sink, called a friend to help with a new connection, and instead of coming over he lent me his fusion tool. I watched a YouTube video, had a go with no real idea what I was doing, and it worked. You can buy a Chinese TuboPlus heater on Amazon for about MX$400 and practise on offcuts for almost nothing.

    A plumber charges somewhere around MX$4,000 a bathroom, more if there are roof connections to bring water down — so if you’re willing to take some of the plumbing on yourself, the saving runs to about MX$10,000. I’m not saying everyone should pick up the tool; bad plumbing hidden in a wall causes expensive problems later. But understanding the system well enough to question and inspect the work protects you even when you hire it out. The plumber knows the technique. You’re the one who has to live with the layout.

    What this page doesn’t cover

    This is the water supply and distribution system — getting water onto the property, stored, pumped, distributed and drained. The off-grid build is a separate body of work, now covered in its own guide:

    • The full rainwater-harvesting setup
    • Filtering crude-first, fine-later (keeping flow rate up in heavy rain)
    • French-drain capture on a slope
    • Planning for the days you catch far more than you can use
    • The three-stage bathroom wastewater system I built

    Read it: off-grid water in Mexico →

    What I’d change

    What I’d do differently

    I’d plan water before the shell, not after. I’d decide between a well, rainwater, or both early, because each one changes the budget, the roof and the cistern. I’d pour a bigger cistern than I thought I needed — mine works, but 12,000 to 15,000 litres would give more margin. I’d walk every bathroom and kitchen pipe route before the walls closed up — toilet and sink positions, shower drains, hot and cold routes, boiler placement, repair access — and I’d check the fall on the drainage before anyone covered it.

    Most of all, I’d price the whole thing as one system rather than a string of separate jobs: source → storage → pump → roof tank → fixtures → waste.

    Water rewards the planning you do before it’s anywhere on site.

    FAQ

    Common questions

    How much does a water system cost for a house in Mexico?

    On my self-managed build in Chiapas, with costs in 2026 pesos, the water system inside the house came to about MX$74,000 — cistern, pump, roof tank, plumbing, boiler connections, wastewater and fittings. That excludes getting water onto the land in the first place; if you need a deep well, budget that separately.

    How much does a deep well (pozo profundo) cost in Mexico?

    I was quoted around MX$80,000 for a deep well on my plot — drilling the bore, dropping in a pump, and connecting it to the house — based on a standard depth of about 25 metres, with an added cost per metre if they have to go deeper. As a foreign resident, confirm whether you need a permit before drilling.

    What size cistern do you need for a house in Mexico?

    Mine holds about 10,000 litres and has been enough for a family of four using somewhere between about 1,000 litres a week (frugal, before laundry) and 2,000 with regular clothes washing. If I were pouring it again I’d go to 12,000–15,000 litres for more margin through the dry season — it’s the one part you can’t easily enlarge later.

    Is rainwater enough for a house in Mexico?

    It depends on your climate, roof area, storage and dry-season length. In my build, rainwater is a major source — the tin roof feeds the cistern — but how much it can carry you comes down to storage and the catchment setup, which deserve their own guide.

    Should I use CPVC or TuboPlus?

    I wouldn’t use one material everywhere. I’d choose TuboPlus for roof and exposed runs, for its toughness and UV resistance, and I’m relaxed about CPVC inside walls because it’s cheaper, simpler and easier to repair if a joint ever fails.

    Luke Burchell

    Written by Luke Burchell

    I self-managed the construction of my own house in San Cristóbal de las Casas, Chiapas, including the cistern, pump, gravity-fed system and the plumbing I learned to do myself. Everything here is from that build: what I paid, what I’d do again, and what I’d plan earlier.

    Read my full story →

    Last updated · July 2026 · San Cristóbal de las Casas, Chiapas

    Figures in Mexican pesos and specific to Chiapas — they’ll differ by region, climate and year. Nothing here is professional plumbing, structural or legal advice; confirm regulated work like deep wells and permits with someone qualified for your own site.

  • Buying land in Mexico as a foreigner: buy the deed, or know you may not own it

    Building in Mexico · what I learned

    Buying land in Mexico as a foreigner: buy the deed, or know you may not own it

    The single most important thing I can tell you about buying land in Mexico: make sure it has a real deed — an escritura pública — or understand that you may not own what you think you’re buying. I learned this buying and registering land near San Cristóbal de las Casas, Chiapas.

    PlaceSan Cristóbal, Chiapas
    BuyerForeign resident
    ZoneInterior (not restricted)
    Key riskNo deed / ejido land

    The short version

    I bought and registered land near San Cristóbal de las Casas, and built my house on it. None of it was impossible — but it was only manageable because the land I bought could be legally registered in my name. That’s the line I wouldn’t cross.

    What it took

    I went through the SRE process foreigners use (the Article 27 convenio de renuncia), used a lawyer, registered the property, paid for a subdivision, and arranged co-ownership for my children. In Chiapas, and especially around San Cristóbal, it’s common to see land sold without deeds — cheap, beautiful, out in the countryside, exactly the kind of land foreigners dream about. But cheap land is often cheap for a reason, and the reason is usually legal.

    The cheapest land often needs the most checking. A low price can mean no water, no services, difficult access, no permission to build, no escritura pública — or a legal status that prevents you from owning it at all. On this kind of purchase, “cheap” and “safe” are rarely the same plot.

    Can foreigners buy

    Can a foreigner buy land in Mexico?

    Yes — but the structure depends on where the land is and what legal status it has. Outside the restricted zone — roughly 50 km from the coast and 100 km from a border — a foreigner can generally buy property directly in their own name, with the correct SRE process and a proper deed. That was my situation: titled land in the interior of Chiapas. Inside the restricted zone, along the coasts and borders, the process is different — foreigners normally use a fideicomiso (bank trust) rather than direct ownership. I didn’t go through that, so I won’t pretend to explain it from experience; if you’re buying near a coast or border, find a notary who specialises in it.

    But the restricted zone isn’t the trap most people fall into inland. The bigger one is the legal status of the land itself.

    The deed

    The real question: does the land have an escritura pública?

    In Mexico, land is often sold without a registered deed. That doesn’t automatically mean a scam — but it means you need to slow down. The question isn’t “is someone selling this land?” It’s “can this land legally be registered in my name?” That’s the difference between buying property and buying uncertainty.

    A proper escritura pública is the document that matters: it shows the land has legal title and can be registered through the public property system. Without it you may have a contract, a receipt, or an agreement with a seller — but not necessarily ownership that protects you later. Having the land’s legal status checked before I bought was one of the most important parts of the whole process.

    Types of land

    The three kinds of land — and which I’d walk away from

    If I were buying again, I’d sort every plot into one of three categories before doing anything else.

    ✓ What you want

    Private titled land, with an escritura pública

    Registered, clear, and legally yours once the purchase completes. Everything else is a question mark until proven otherwise.

    ~ Verify before trusting

    Land that may be in a legal process

    Being subdivided from a larger plot, or where the seller says the deed process is “underway.” It can be genuine — owners often sell plots to raise the money to then register them — but “underway” isn’t “done.” Make your own lawyer confirm exactly what can be registered, when, and in whose name.

    ✕ Walk away

    Ejido, communal, conservation or no-deed land

    Land that can’t currently be registered in your name. The view, the price, and the dream are all secondary to this. Ejido land in particular catches the most people — see below.

    Ejido warning

    Why you should not buy ejido land as a foreigner

    This is the most important part, so I’ll be blunt, then tell you to confirm it yourself — because it matters that much.

    Ejido land is communal agricultural land, held by a community of ejidatarios who have use rights under Mexico’s agrarian system. It’s tempting: cheaper than titled land, usually outside the towns, often exactly the space-and-nature plot a foreigner wants. Around San Cristóbal, many foreigners have put money into ejido land.

    Here is the problem. If land is still ejido land, there is no normal private deed to register in your name. You may be able to pay someone, build, and live there for years — but you are not holding ordinary private property title. You’d be depending on informal arrangements and the goodwill of a community whose decisions can change. If the Ejido Assembly changes its members or simply changes its mind about who lives there, you could lose your home and have little or no practical legal route to recover what you paid.

    I’m being careful with my wording because the consequences are so severe: this is my understanding as someone who bought land here and watched others navigate it, not legal advice, and the rules are technical.

    The rule I’d give any foreigner

    If the land is still ejido, don’t buy it. If someone tells you it used to be ejido but is now private property, make your own lawyer prove that with the registry before you pay a single peso.

    There is a legal process (you’ll hear regularización or dominio pleno) that can convert ejido land into registrable private property. But most of the cheap “ejido” plots being sold have not completed that conversion. Until it’s done and there’s a real, registrable title, treat it as land you cannot own. And if someone discourages you from checking — that is your answer.

    How to check

    How to check land before buying in Mexico

    The one check that matters most is whether the land can be legally registered in your name. In practice that means verifying the escritura pública, the current legal owner, the boundaries, the registry status, any debts or liens, and whether the land is private, ejido, communal or conservation. A good lawyer or notary does this as a matter of course. If there’s any chance of agrarian status, the Registro Agrario Nacional (National Agrarian Registry) is the place to confirm it; for private property, the local Registro Público de la Propiedad (Public Registry of Property). I wouldn’t rely on the seller’s word, the seller’s lawyer, or a neighbour saying “everyone does it.” For a foreigner putting savings into a build, the cost of checking is tiny next to the cost of buying land you don’t truly own.

    Finding land

    How I found my land

    People assume you find land through an agent. You can, but it’s only one route — and not how I did it. In San Cristóbal there are roughly four ways.

    Facebook is the main local marketplace in Mexico for almost anything, land included; local groups, including the San Cristóbal international-community ones, regularly post rustic plots. Established agencies like Remax and Century 21 have a real presence in Chiapas and feel familiar if you’re used to formal listings. Independent local agents advertise some plots online but rely heavily on their own “Se Vende” signs near the land; they’ll show you a plot but usually aren’t part of the legal sale — you deal directly with the owner, who pays the agent a commission behind the scenes. And the most old-fashioned route, which is how I found mine: a hand-painted “Se Vende” sign nailed to a fence near the property. Selling directly to avoid an intermediary is very common here — after I bought, the seller even offered me a commission if I found a buyer for a neighbouring plot. That’s how direct the market can be.

    The actual plot

    Rustic plot of land outside San Cristóbal de las Casas, Chiapas — concrete boundary posts with barbed-wire fencing, a hand-painted Se Vende sign on a post, and a bicycle leaning against the fence.
    The plot I bought, with the hand-painted “Se Vende” sign still on the fence post — and the bike I scouted the area on. Outside San Cristóbal de las Casas, Chiapas.

    However you find it, the rule is the same: finding the land isn’t the hard part. Verifying it is.

    Scout the area

    Spend time in the area before you buy

    Don’t visit a plot once, fall for the view, and start imagining the house. Talk to people already living nearby — about water, access, electricity, transport, humidity, security, and whether land in that area normally has proper deeds. Make a list of non-negotiables before you start looking. Mine included distance: I knew I didn’t want to depend on cycling downtown every day, and I wanted cleaner air than the centre of town. I bought a small PM2.5 air-quality sensor, and it confirmed what I suspected — particle pollution is high in many Mexican towns, around traffic, dust and wood smoke, and much lower a couple of miles out.

    The surprise was humidity. In the rainy season my indoor humidity runs higher out here than it would in town — which matters for comfort, mould, storage and materials. A plot isn’t just a price per square metre; it’s a microclimate, a water decision, and a transport decision all at once.

    What it cost

    What the purchase involved, and what it cost

    I bought titled land outside the restricted zone, as a foreign resident. My lawyer handled the SRE permit. From getting that permission, signing the contract and paying a deposit, to the land being registered in my name took six months — a timeline that surprised me. If you’re planning a build, don’t assume finding land and owning land are the same stage; the purchase itself can take months, and you shouldn’t plan the rest of the build as if the land is yours the moment you agree a price.

    The costs surprised me too — the price of the land was one thing, the cost of legally acquiring it was another. Here’s what I paid, separate from the land itself. Treat it as a real example from my 2017 purchase — the plans and planning permission came a little later, in 2018 — not a current price list; fees change, and lawyers include different things in their quotes.

    What the purchase cost — 2017–18 example

    ItemWhat I paidNote
    SRE Article 27 process~MX$4,0002017, included lawyer help. SRE sets the official fee yearly (current figures published on SRE’s costs-and-times page); 2026 sources cite roughly MX$5,000–5,500. Check the current official amount and confirm what your lawyer’s quote includes
    Lawyer, paperwork & registry~MX$30,000One of the largest non-land costs
    Legal-status verification~MX$650Required in my process
    Land valuation~MX$600The valuation isn’t the price you pay
    Planning permissionMX$5,6222018. Based on the official land value, not the purchase price
    Architectural plans~MX$20–30k2018. Sometimes included if the architect also builds
    Subdivision of the plot~MX$10,000My estimate — it sat inside larger bills; see below

    The lesson: “the land price” and “the cost of legally acquiring buildable land” are two different numbers. I’ve broken down the full build costs separately in what it costs to build a house in Mexico.

    Land prices

    How much does land cost near San Cristóbal?

    As a rough local reference: on the outskirts with basic services, around MX$3,000/m²; closer to markets and more desirable areas, up to about MX$5,000/m². Those aren’t official prices — they move with location, access, slope, services, water, legal status and year — so treat them as a starting point, not a market rate. And be careful comparing a “cheap” rustic plot against titled land: once you account for missing water, deeds, access or build permission, the cheap one often isn’t.

    Subdivision

    Buying part of a plot: subdivision is possible

    Worth knowing even if you don’t expect to need it: land can sometimes be subdivided as part of the purchase. In my case the seller let me buy half of a larger lot, which meant the land had to be legally divided and registered — handled at the same time as the purchase. I didn’t get an isolated figure for it (it sat inside larger bills); I’d estimate it at roughly MX$10,000 in 2017, but the real point isn’t the number — it’s that subdivision is an option, and one many buyers don’t realise exists. If you’re buying part of a property, don’t treat a fence line or the seller’s description as enough; you need to know the subdivision can be legally done and registered. The same goes in reverse — adjacent plots can sometimes be combined into one legal property (I built across two, so combining made sense). Handle it through the lawyer as part of the purchase, never informally.

    Co-ownership

    Co-ownership: a usufructo vitalicio for my children

    From my actual deed

    Redacted page of a Mexican escritura pública from Chiapas showing the purchase clauses that name the buyer's children as co-proprietors of the land.
    The page of my escritura naming my children as co-proprietors (identifying details redacted). The usufructo vitalicio that completes the arrangement was an additional page added to the same deed at purchase.

    One of the most useful things I did — and something many foreigners don’t know to ask about — was arrange co-ownership for my children combined with a usufructo vitalicio (a lifetime usufruct) for me. I can’t take credit for the idea: my notary suggested it as soon as we started the purchase process and saw I had young children. I’m sharing it not as legal advice but because it’s an option worth knowing exists.

    The structure, as it worked in my case: my children are named in the escritura itself as co-proprietors of the land, and I hold the lifetime usufruct — the right to use and control the property for as long as I live. On paper it was remarkably light: one additional page added to the deed. If something happens to me, the property is already structured to protect my children’s claim to it, rather than leaving everything to a long, costly inheritance process later. The family’s interest is built into the title from the start. And no — it doesn’t mean the children can sell the house out from under me after a Christmas-dinner argument: the usufruct is a lifetime right that stays attached to the property whatever happens, so as it was explained to me, no sale can strip me of the use of the place while I live.

    What it doesn’t do — the trade-offs

    The protection cuts both ways. My children are the underlying owners, so I can’t sell the property on my own either — the usufruct protects my right to live here for life, not my power to dispose of the place. A future sale would need everyone with legal capacity to agree, and while children are minors, Mexican law tightly restricts selling property held in their name at all — broadly, only where there’s real necessity or clear benefit to them, and with a judge’s authorisation. None of that worries me; it’s the point of the structure. But go in with your eyes open: you’re trading unilateral control for built-in protection, and that trade should be a decision, not a surprise.

    Two more things worth raising with the notary before signing: ask whether the usufruct is drafted to cover not just the land but whatever you later build on it; and if the land is in Mexico’s restricted zone — near the coast or a border, which mine isn’t — the whole conversation changes, because foreigners hold property rights there through a different mechanism (a fideicomiso).

    Adding it at the time of purchase also kept the cost down: the paperwork it relied on — the land appraisal, the registry work — was already being done as part of the purchase, so I didn’t pay for any of it twice. What it added was the notary’s fee and the transfer tax for the children’s share, which together came to under MX$10,000 in 2017. Arranged separately later, the same protection would have meant paying appraisal and registry costs all over again. And there’s a quieter saving underneath that, as I understand it: everything was calculated on the value of raw land, before any house existed. The house I built afterwards simply became part of land my children already co-owned — not a separate asset that would one day need transferring to them at house prices. Confirm how that works for your own case with the notary; this is exactly what they’re for.

    So if you’re buying land here and have children or long-term family considerations, raise it with your notary at the start of the purchase, not after — ask directly about ownership structure, usufructo and inheritance. I wouldn’t assume my arrangement is right for everyone — nationality, tax, marriage, inheritance and future plans all matter — but don’t leave that conversation for later.

    No water

    If the land has no water

    Land doesn’t always come with a water connection. Mine didn’t — and that changes the real cost of a plot. Your options may be rainwater catchment, trucked water, a local connection, or a well. In my area a drilled deep well (pozo profundo) was quoted at around MX$80,000 to drill, pipe, fit a pump and connect to the house, based on a depth of about 25 metres with extra cost per metre beyond. Before assuming you can drill, check the requirements: water is regulated, wells may need permission, and as a foreign resident you should have your lawyer confirm exactly what permit you need for your situation before spending. I cover the full water system — cistern, pump, gravity feed and plumbing — in water system for a house in Mexico, but for land buying the point is simple: no water isn’t a detail, it’s one of the biggest factors in whether a plot is actually affordable.

    If you do end up relying on rainwater, the roof you build matters more than you’d think — the material changes how clean the captured water is. I get into that in tin roof vs concrete roof in Mexico.

    My pre-purchase checklist

    • Does the land have an escritura pública, and can it be registered in my name?
    • Is it private property — or ejido, communal, or conservation land?
    • Has an independent lawyer or notary (not the seller’s) checked the legal status in the property and agrarian registries?
    • Is the seller the actual legal owner, and is the plot free of debts, liens or boundary disputes?
    • Is there legal road access, water, and electricity nearby?
    • Is the land flat and stable enough to build what I want affordably?
    • Can I get permission to build what I’m planning?
    • If it’s being subdivided, can the subdivision be legally registered?
    • If I have family, what ownership or inheritance structure makes sense?
    • What’s the total cost after legal work, water, access, plans and services — not just the land price?

    Final advice

    What I’d tell another foreigner buying land here

    Spend time in the area first. Decide your non-negotiables before you fall for a plot. Then slow down before paying — because the most dangerous moment is when the land feels perfect and you want the deal to be true. That’s exactly when you need to become boring: ask for the deed, ask who owns it, ask whether it’s private property, ask whether it was ever ejido land, ask whether it can be registered in your name. Ask your own lawyer, not the seller’s. Ask the notary. Ask the registry.

    If the land has a clear escritura pública and your own independent professional confirms it can be registered in your name, you’re dealing with something solid. If it has no deed, or is still ejido, communal or conservation land, understand what that means before you pay: you may be buying a hope, a promise, or an informal right to occupy — not ownership.

    Buy the deed. Or know exactly what you’re getting without it.

    Luke Burchell

    Written by Luke Burchell

    I bought and registered land, then self-managed the construction of my own house, in San Cristóbal de las Casas, Chiapas — handling the permits, the lawyer, the registry and the build myself, while living locally. Everything here is from that experience.

    Read my full story →

    Last updated · July 2026 · San Cristóbal de las Casas, Chiapas

    This article is based on my own experience buying land near San Cristóbal de las Casas, Chiapas, and on general information I verified while writing. It is not legal advice. Property law, ejido rules, restricted-zone requirements, water permissions, inheritance structures and registration processes are technical and can change, and every plot is different. I’ve linked to official sources where possible, but you should confirm current rules directly with your own notary or lawyer, the SRE, the Registro Público de la Propiedad, and the Registro Agrario Nacional. Before buying any land in Mexico, have your own independent notary or lawyer — not the seller’s — verify the legal status, whether the land can be registered in your name, and whether there are any agrarian, conservation, water, inheritance, access, boundary or planning issues. The cost of checking is small next to the cost of buying land you don’t truly own.